This weekend I made an SD2IEC circuit with prototyping board and some more components, then I designed and printed a case for it.
SD2IEC is a device that fools Commodore 64 to read / write floppy disk images with an ATMEGA microcontroller. It's not a cycle exact emulation, so it has flows on using on real c64. But it has also a unique type of use by it's nature. Like sid file listing for a Sid player or transfering non-standard files between other C64 devices (for example transfering CRT files to the Easyflash Cartridge).
More about SD2IEC can be found by these links:
https://www.c64-wiki.com/wiki/SD2IEC
https://github.com/rkrajnc/sd2iec
There are several revisions and variations of this design but I followed the circuit design on this link: http://pungas.space/blog/index.php?option=com_content&view=article&id=8:build-your-own-sd2iec-with-or-without-pcb-in-english&catid=8&Itemid=102
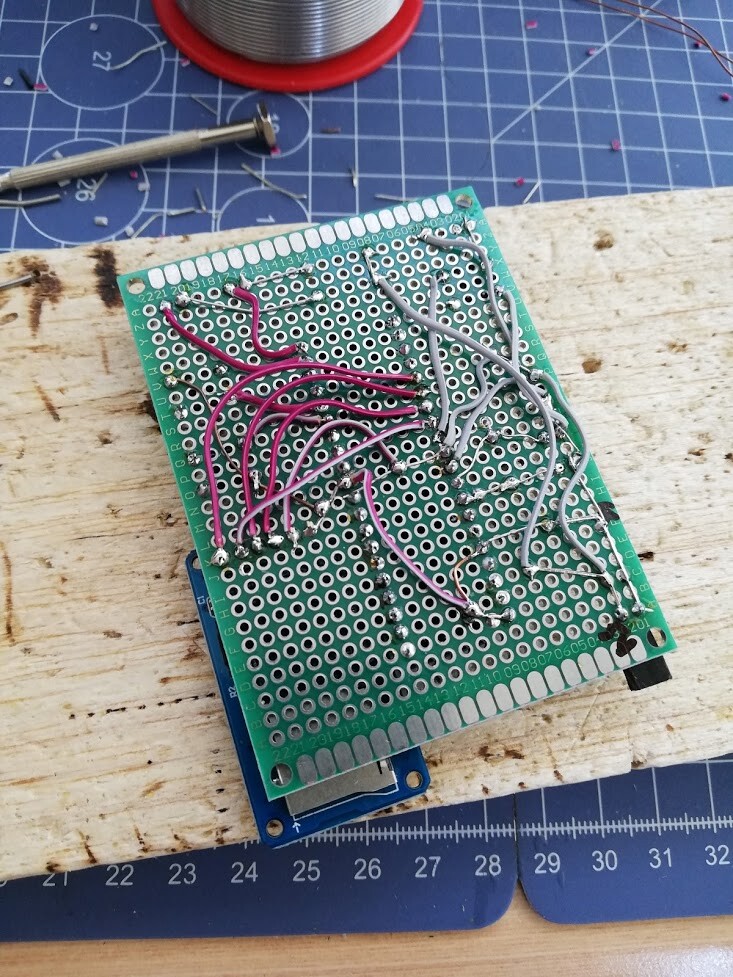
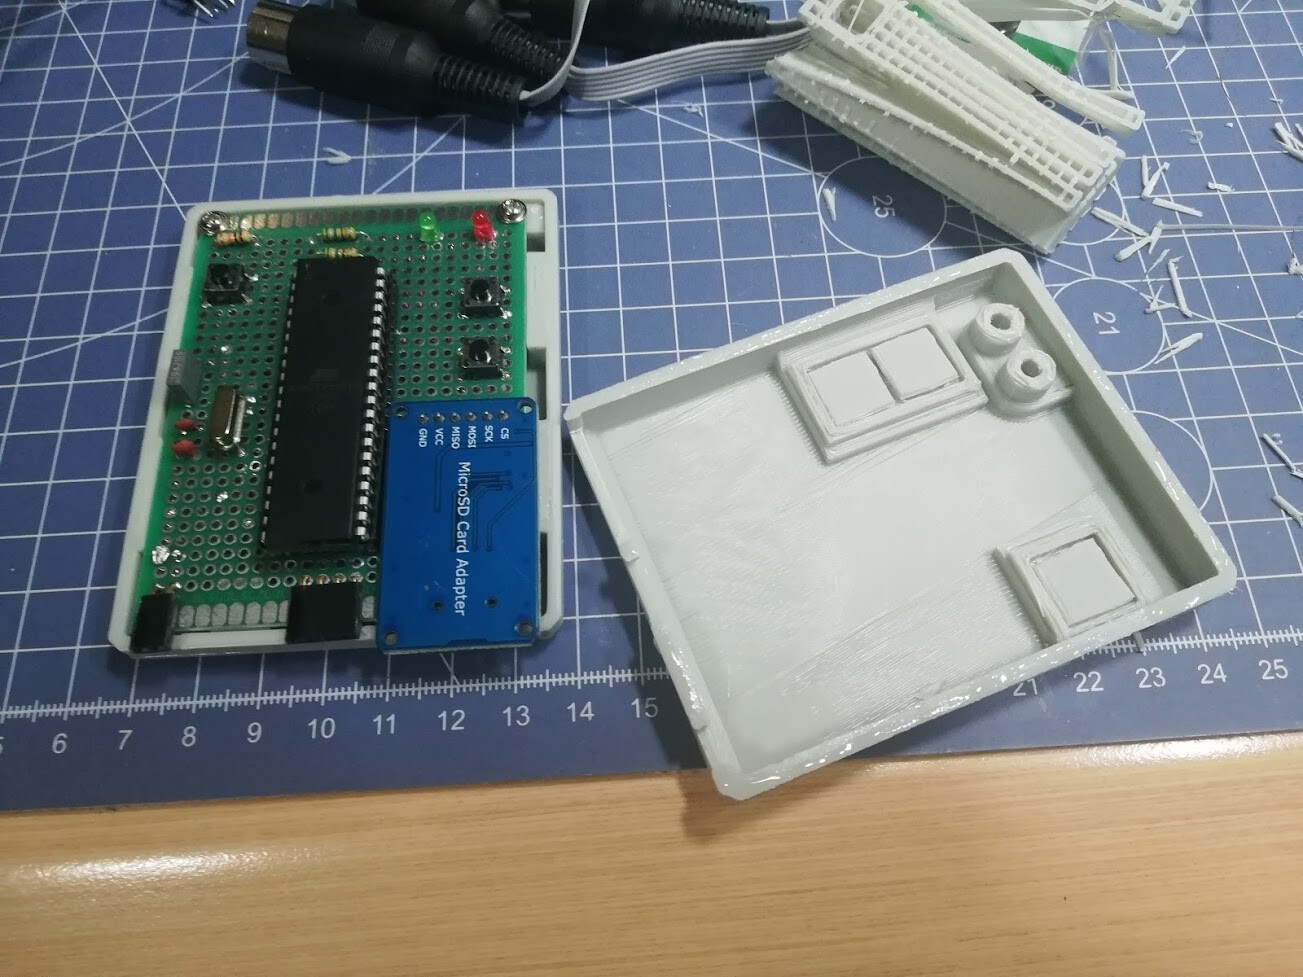
I checked the connections on the schematics and made layout by considering the best short connections for all components. Since the hard part here to program the microcontroller with a programmer, I passed this part with the help of a friend who already made the programming for me and sent the microcontroller to me. Thanks to Türker Gürevin!
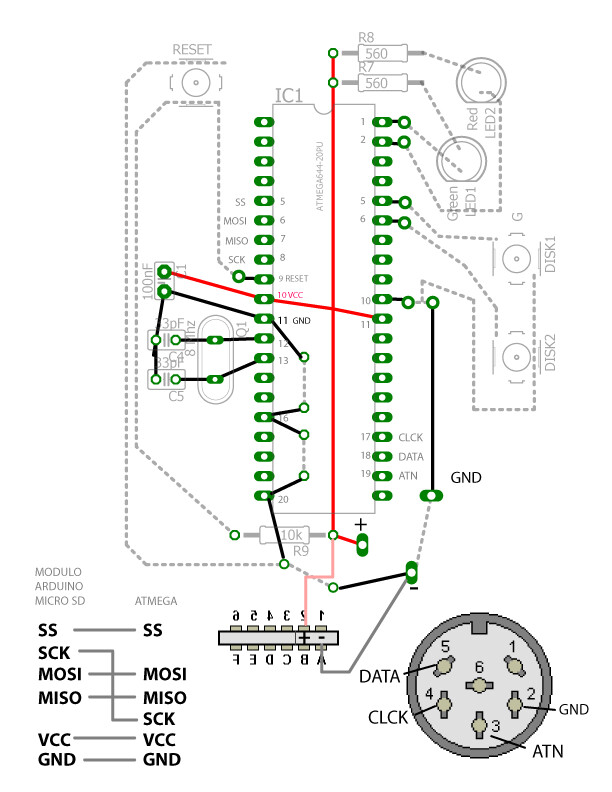
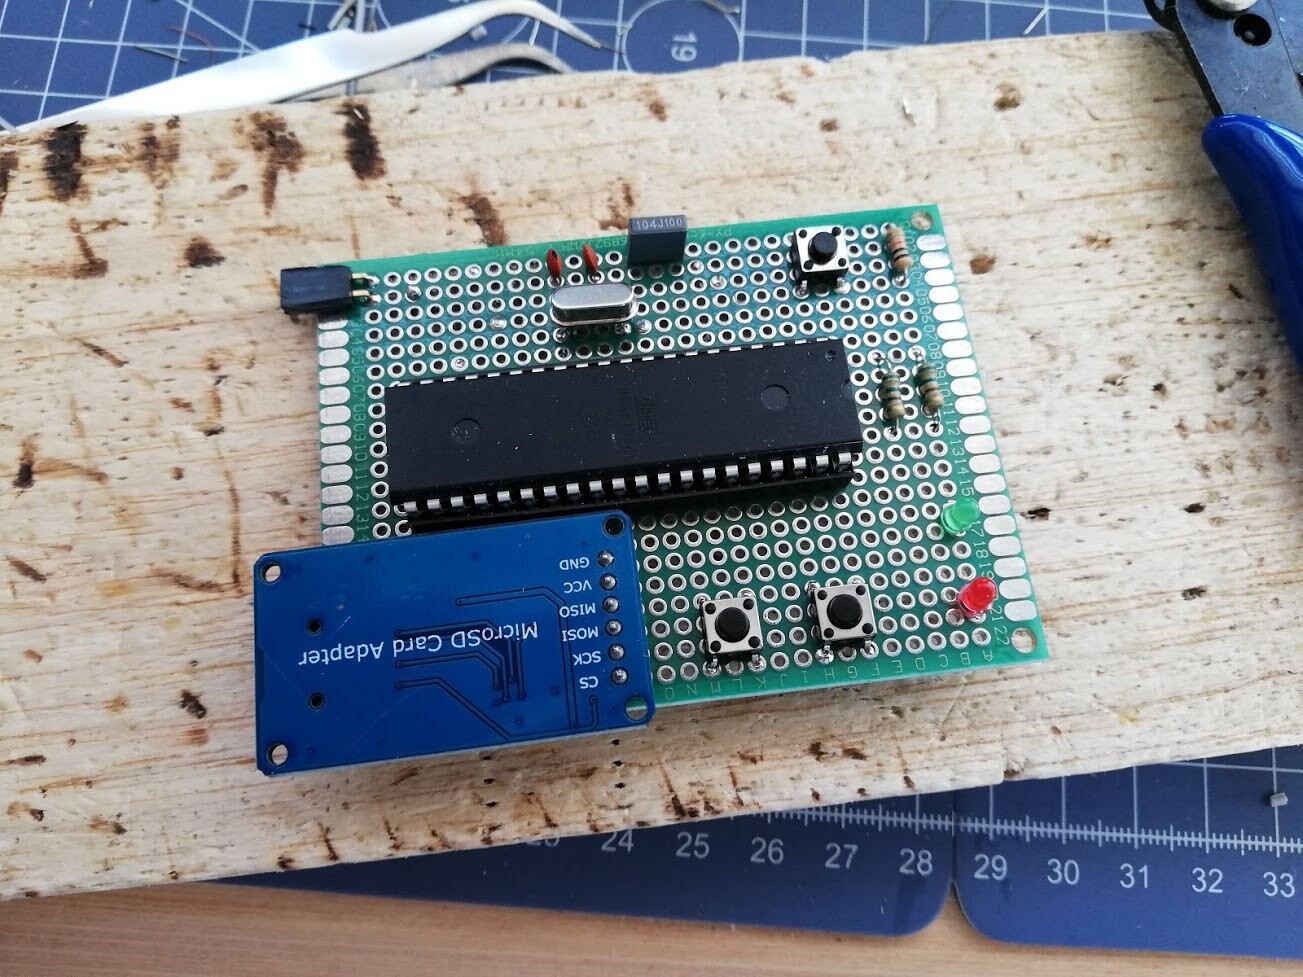
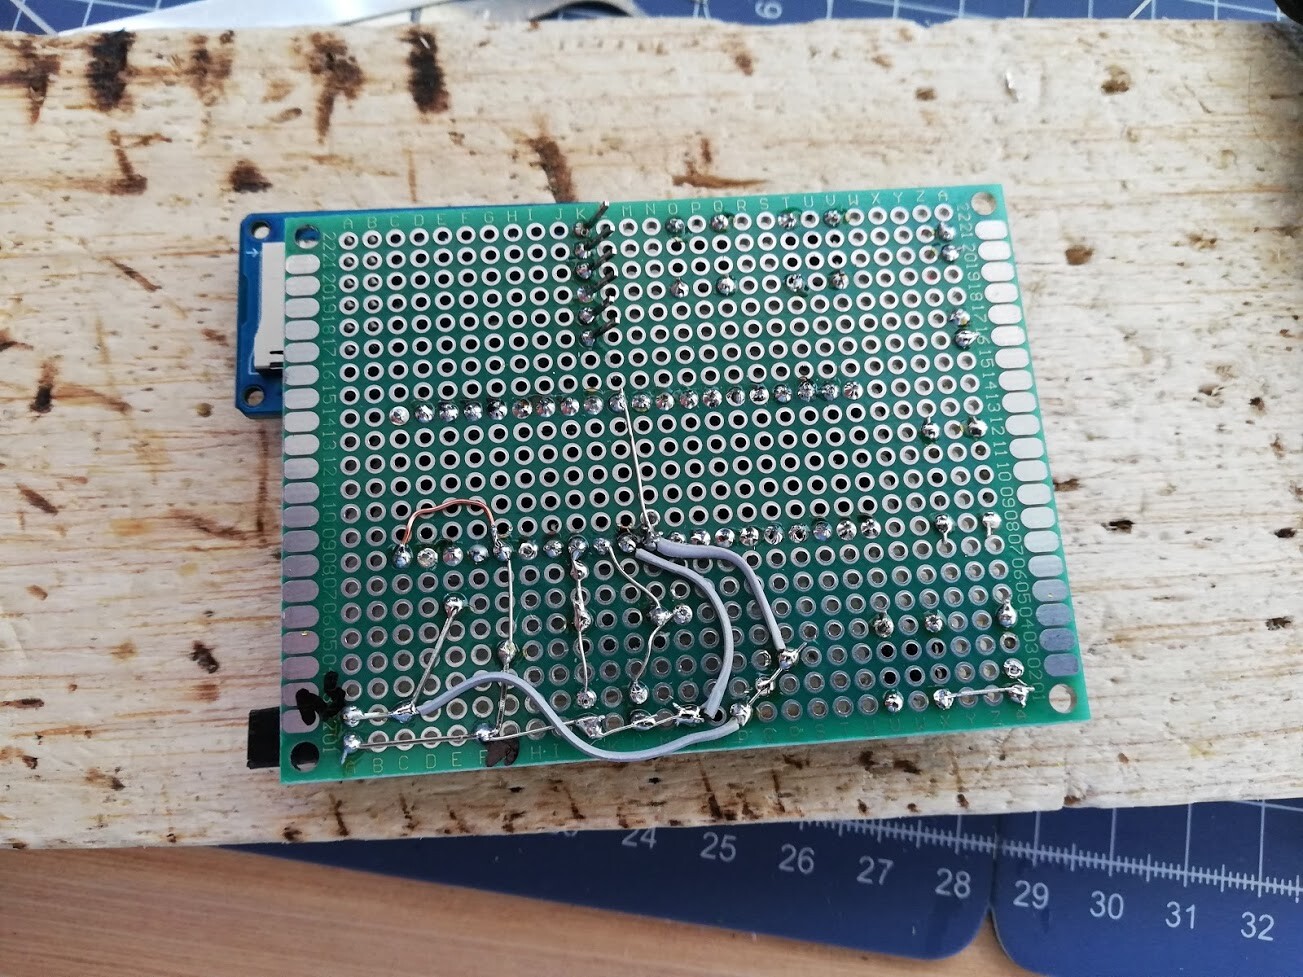
Next, I made all the soldering according to the schematics with naked coppers and cables.
Nest step vas to make a cable for the IEC plug of the C64. I use and like flex cables for this kind of job.
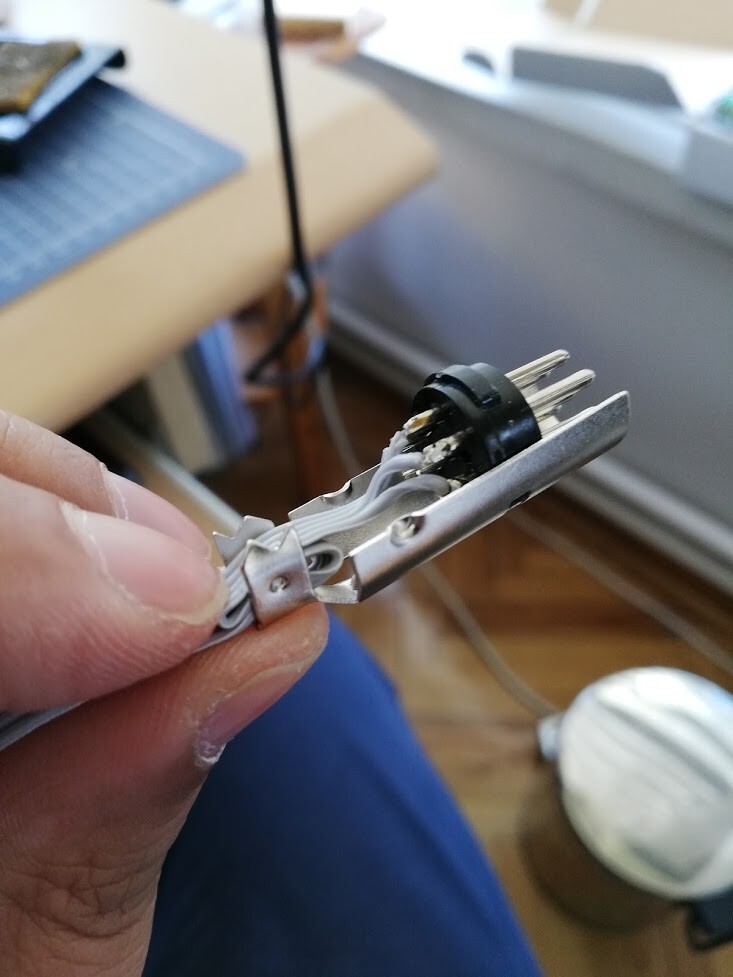
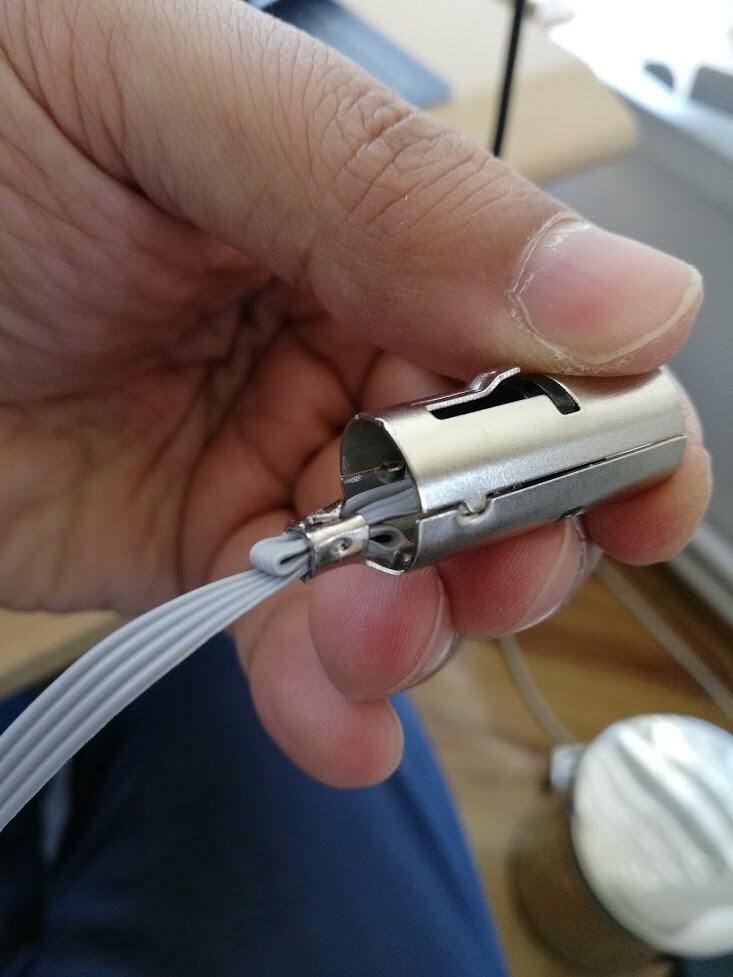
And for doubling that din cables, I used a on-cable IDC connectors. This way I don't interrupt the flow and also can add parallel connections to the cable.

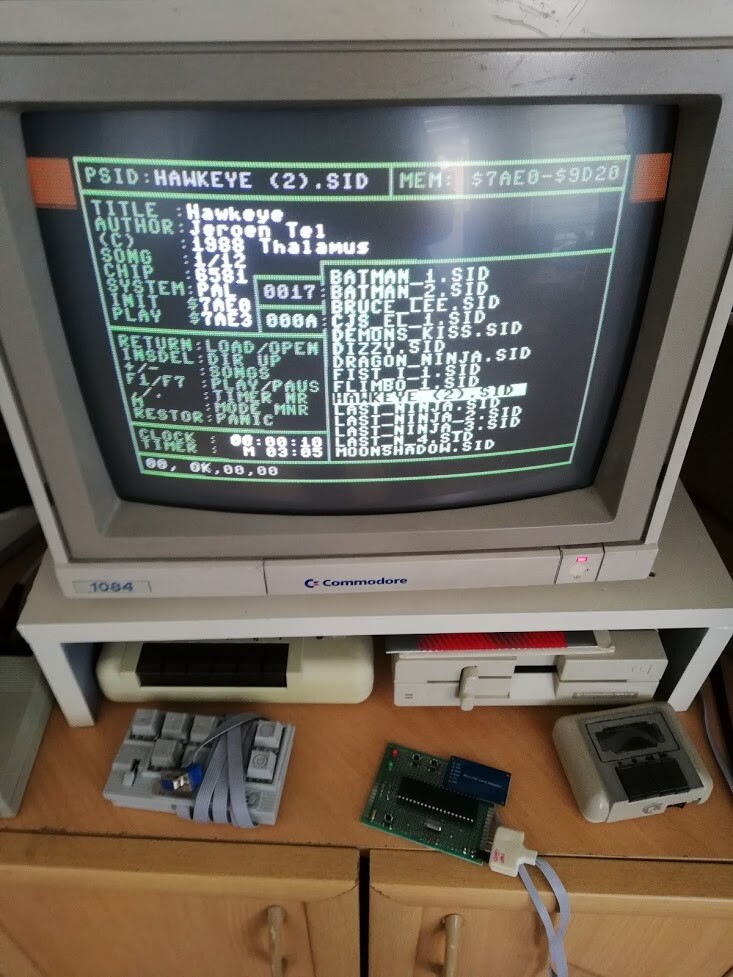
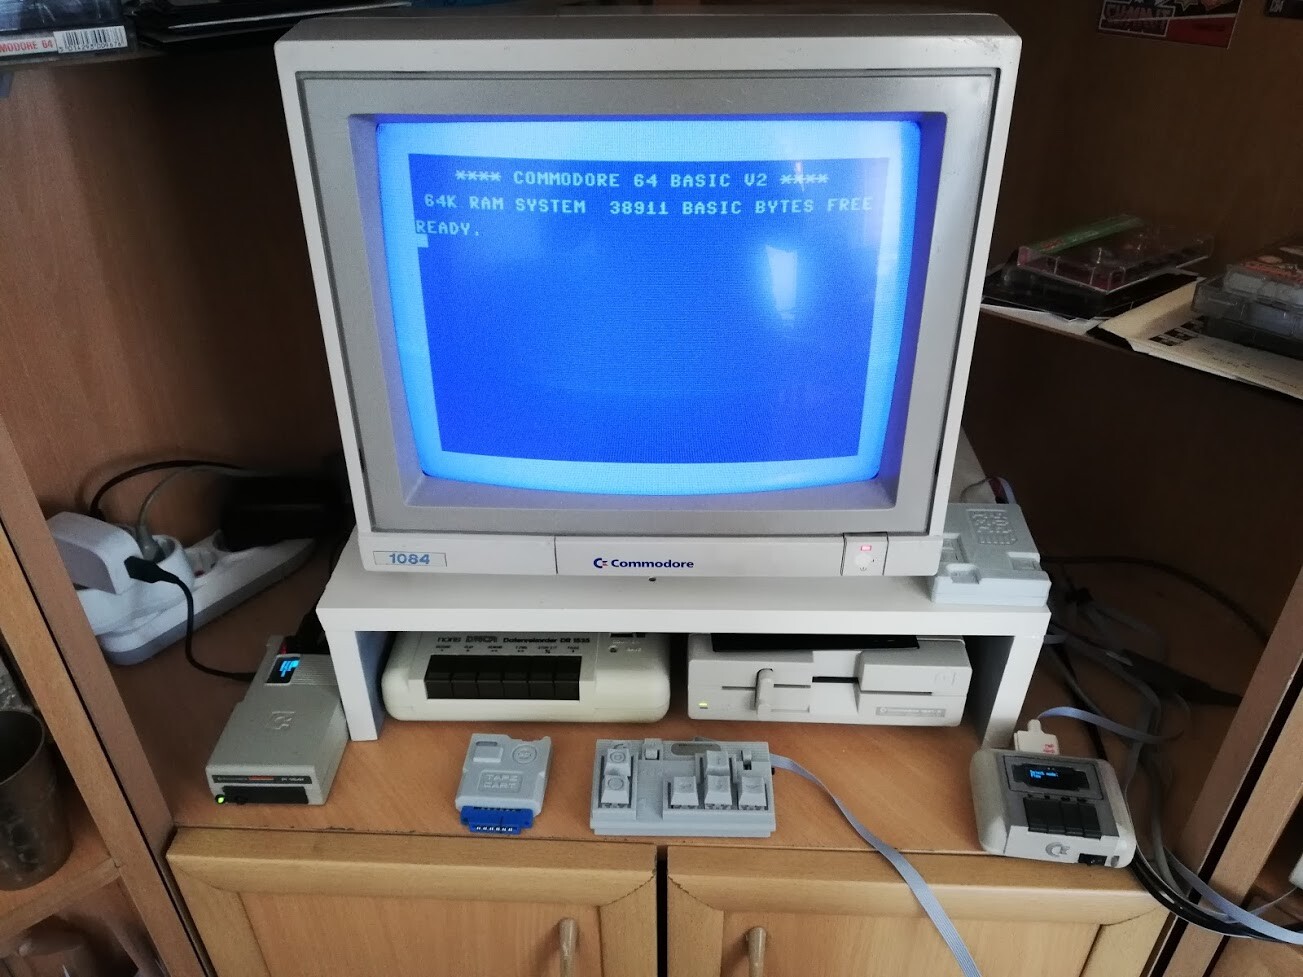
After completing the soldering and cable preparation, I connected the device to my real C64 and tested it. Works nice!
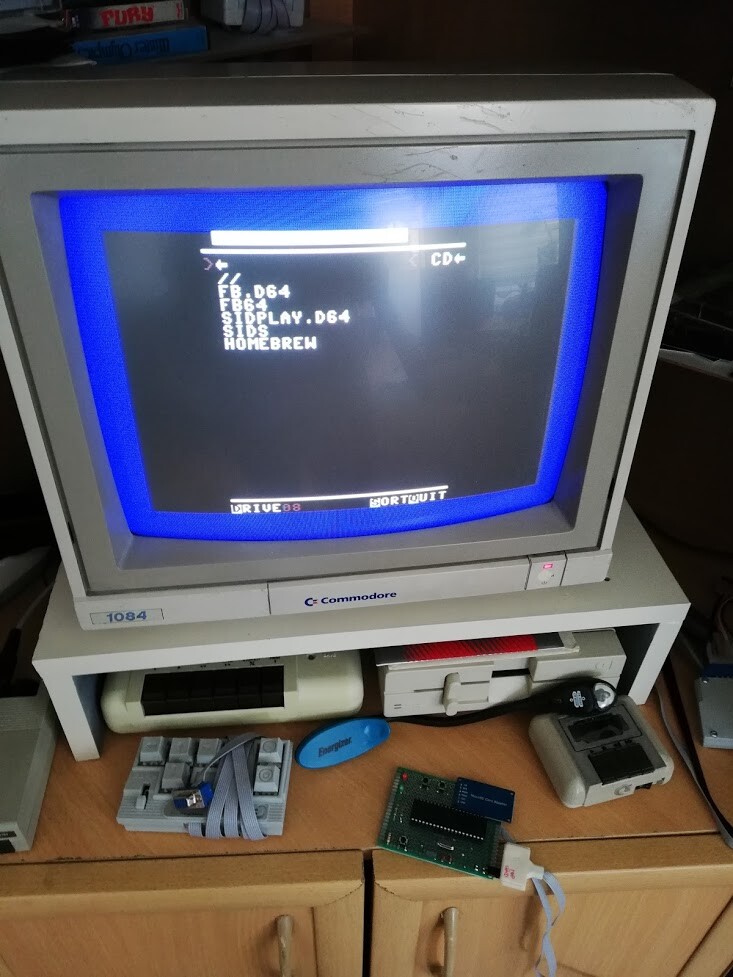
Playing some sid music from the listed files within the SD2IEC.
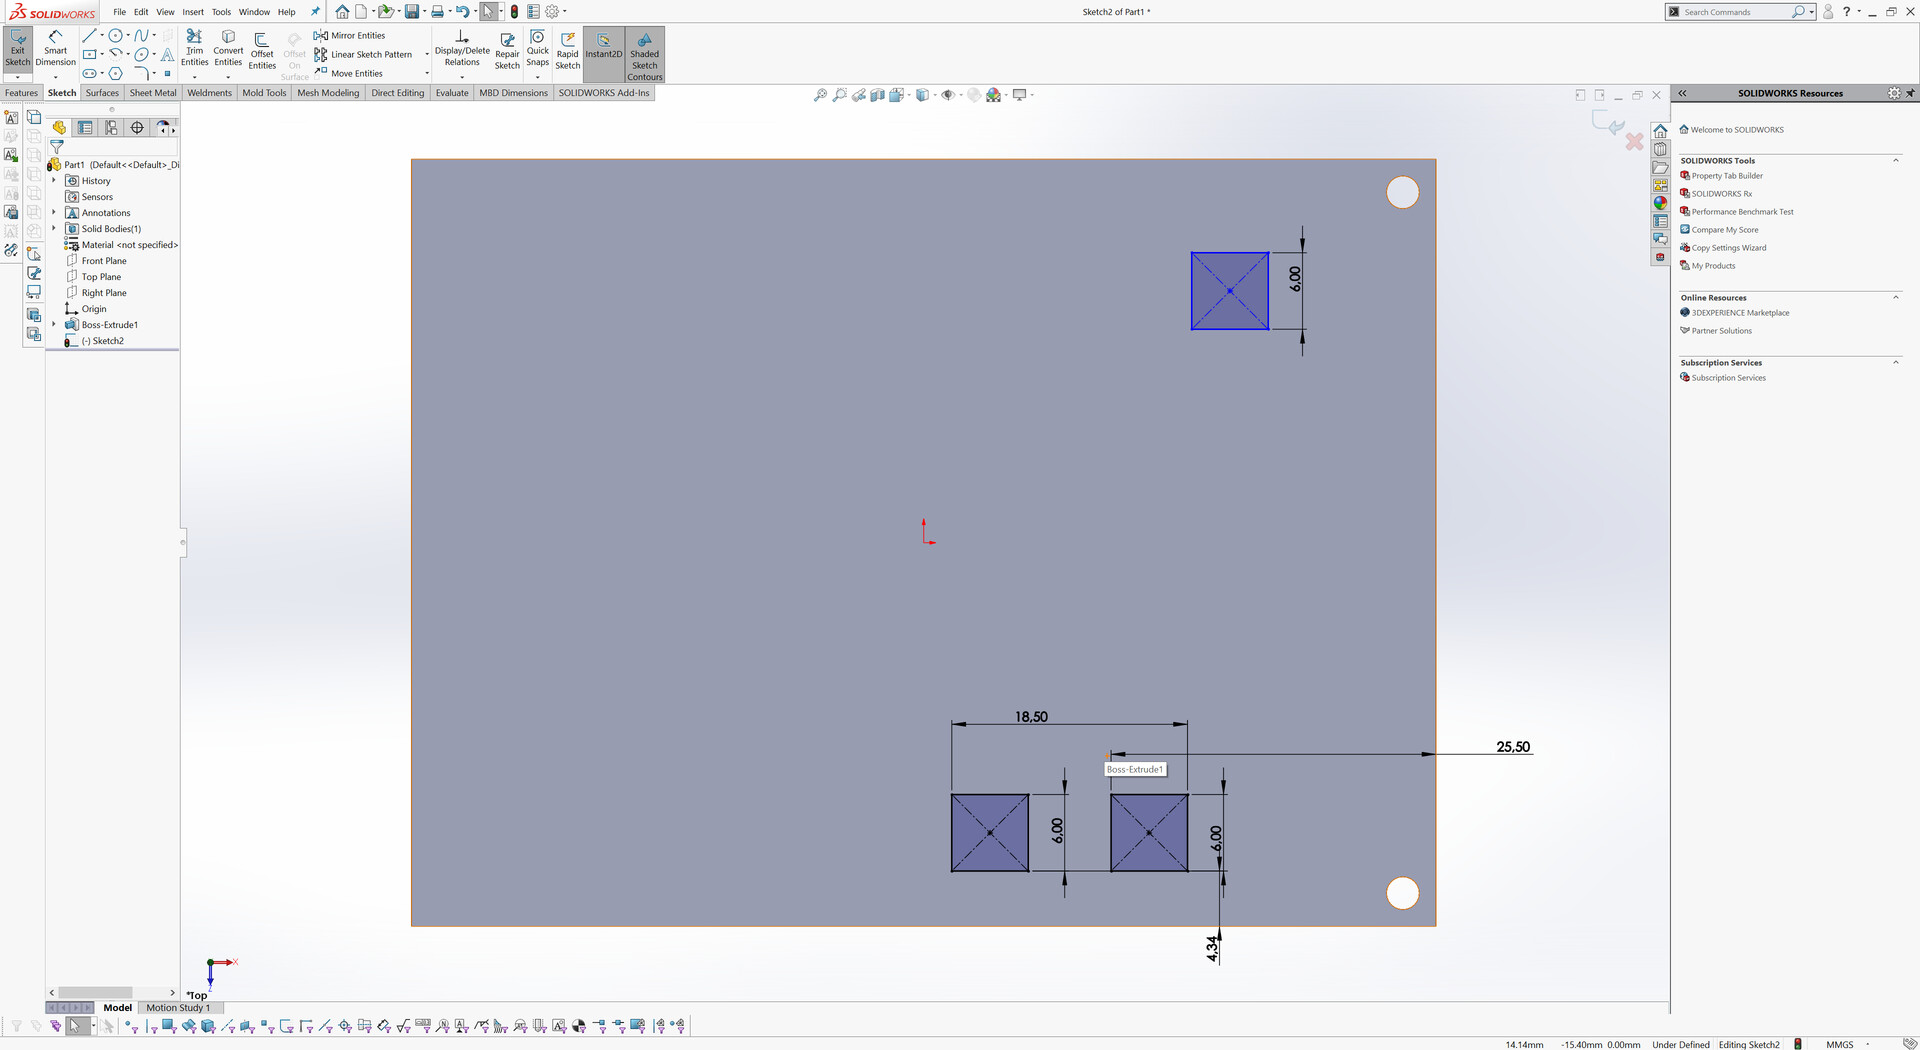
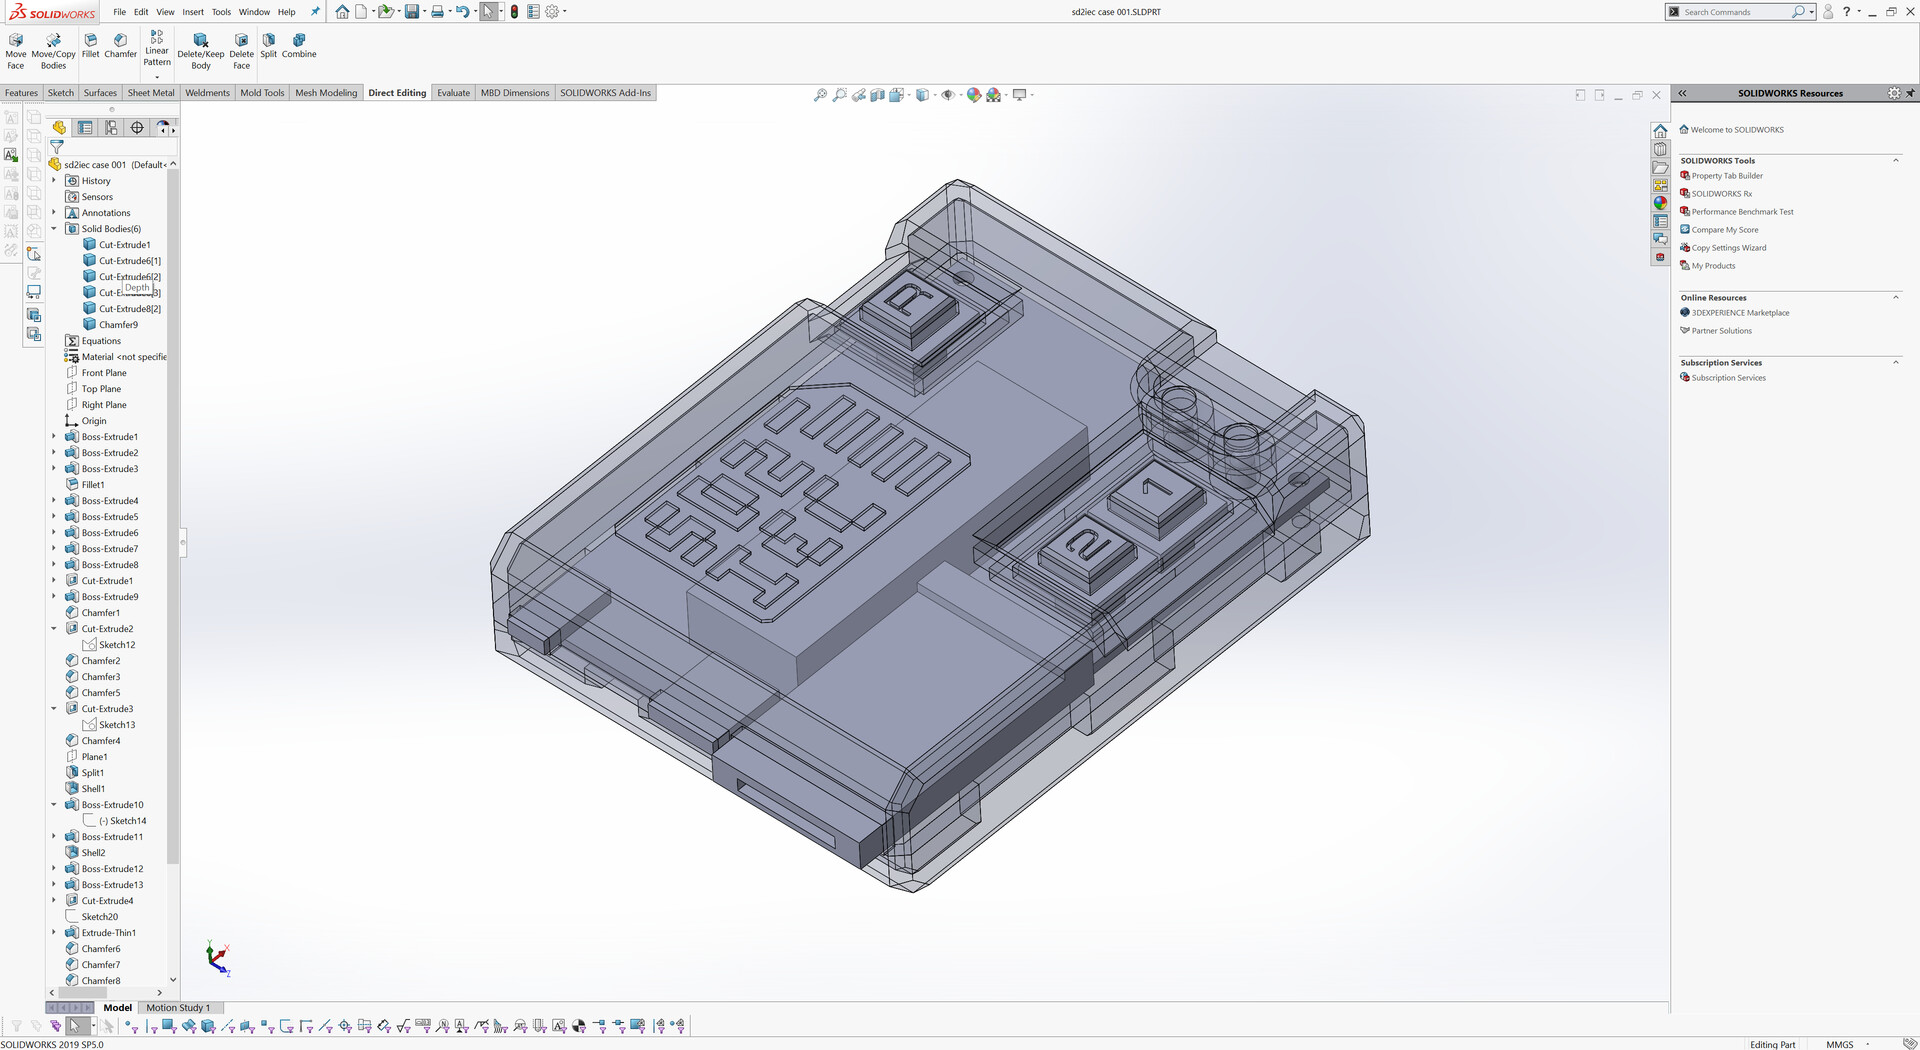
So after the electronic part is complete, I made a quick design for the case. By using Solidworks of course!
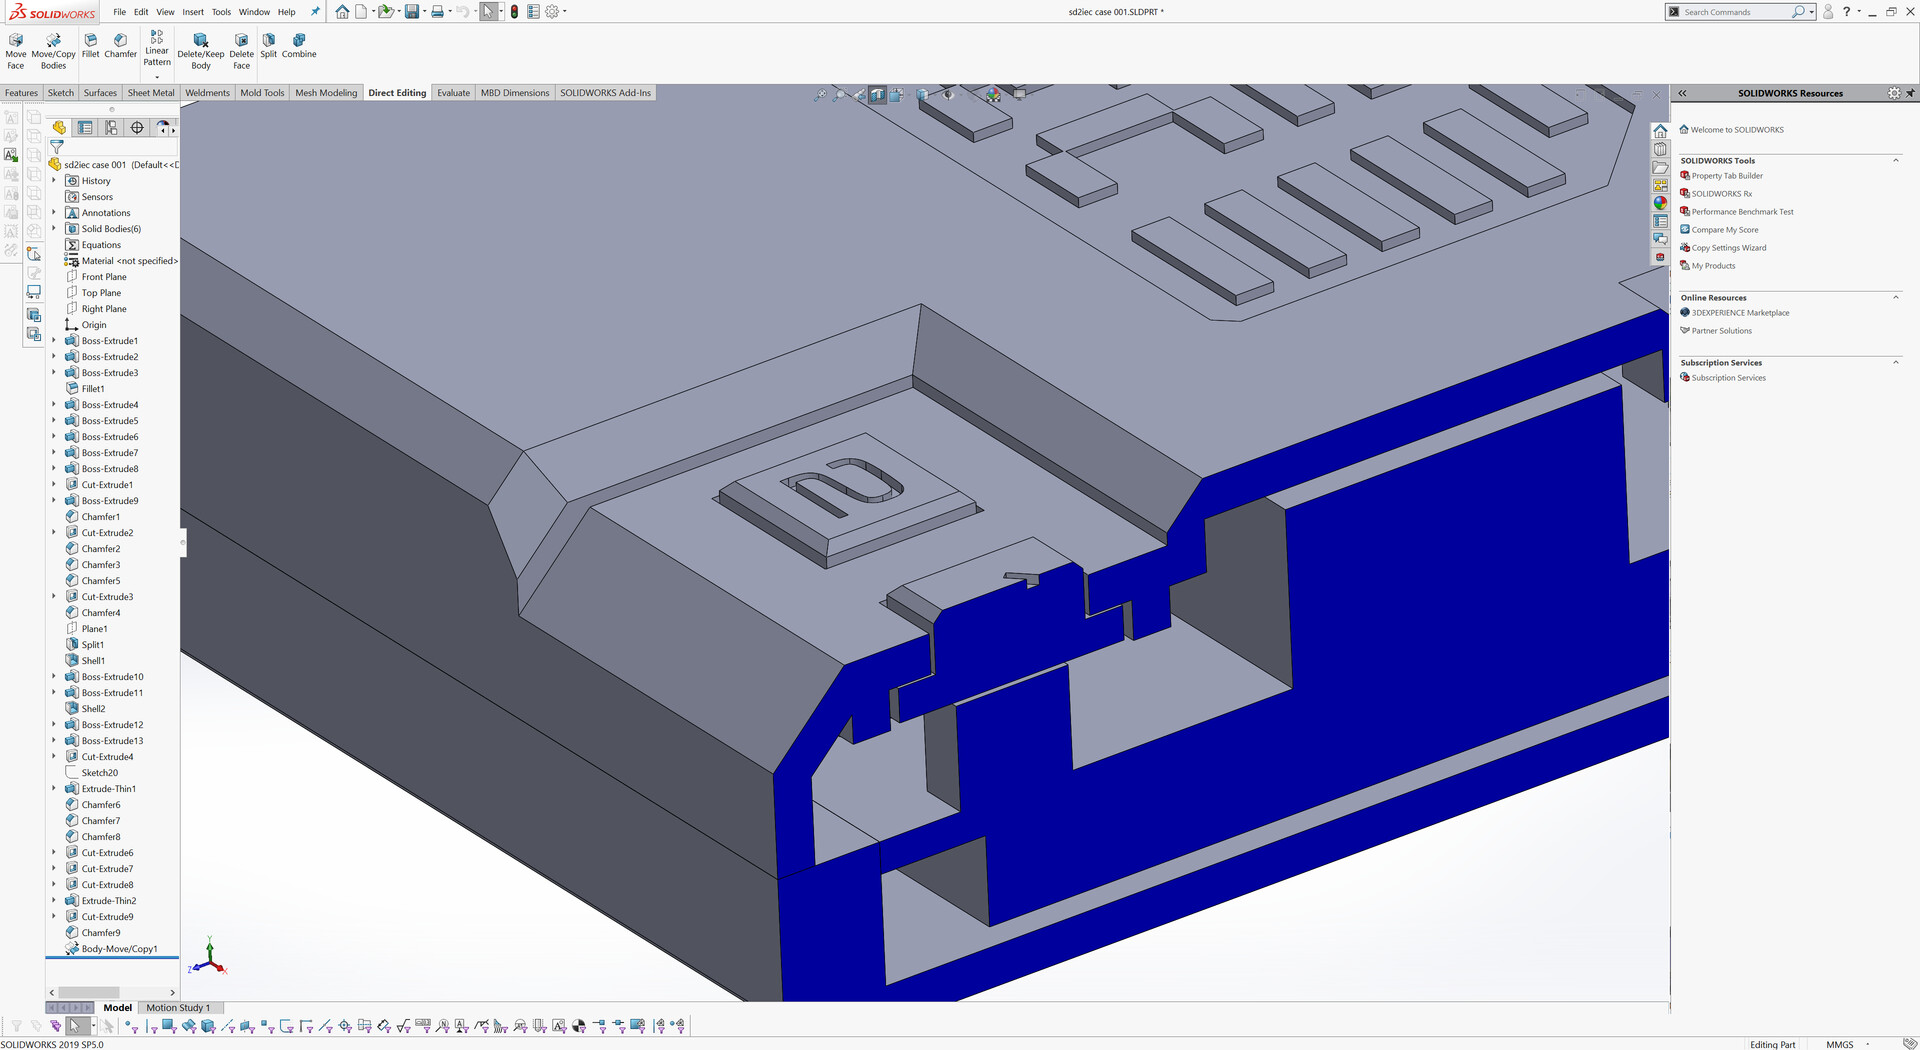
First I created rough geometry of the electronic part and the buttons etc. to see the critical clearances better while designing the case. I took measures with calipers and entered the dimensions while modeling.
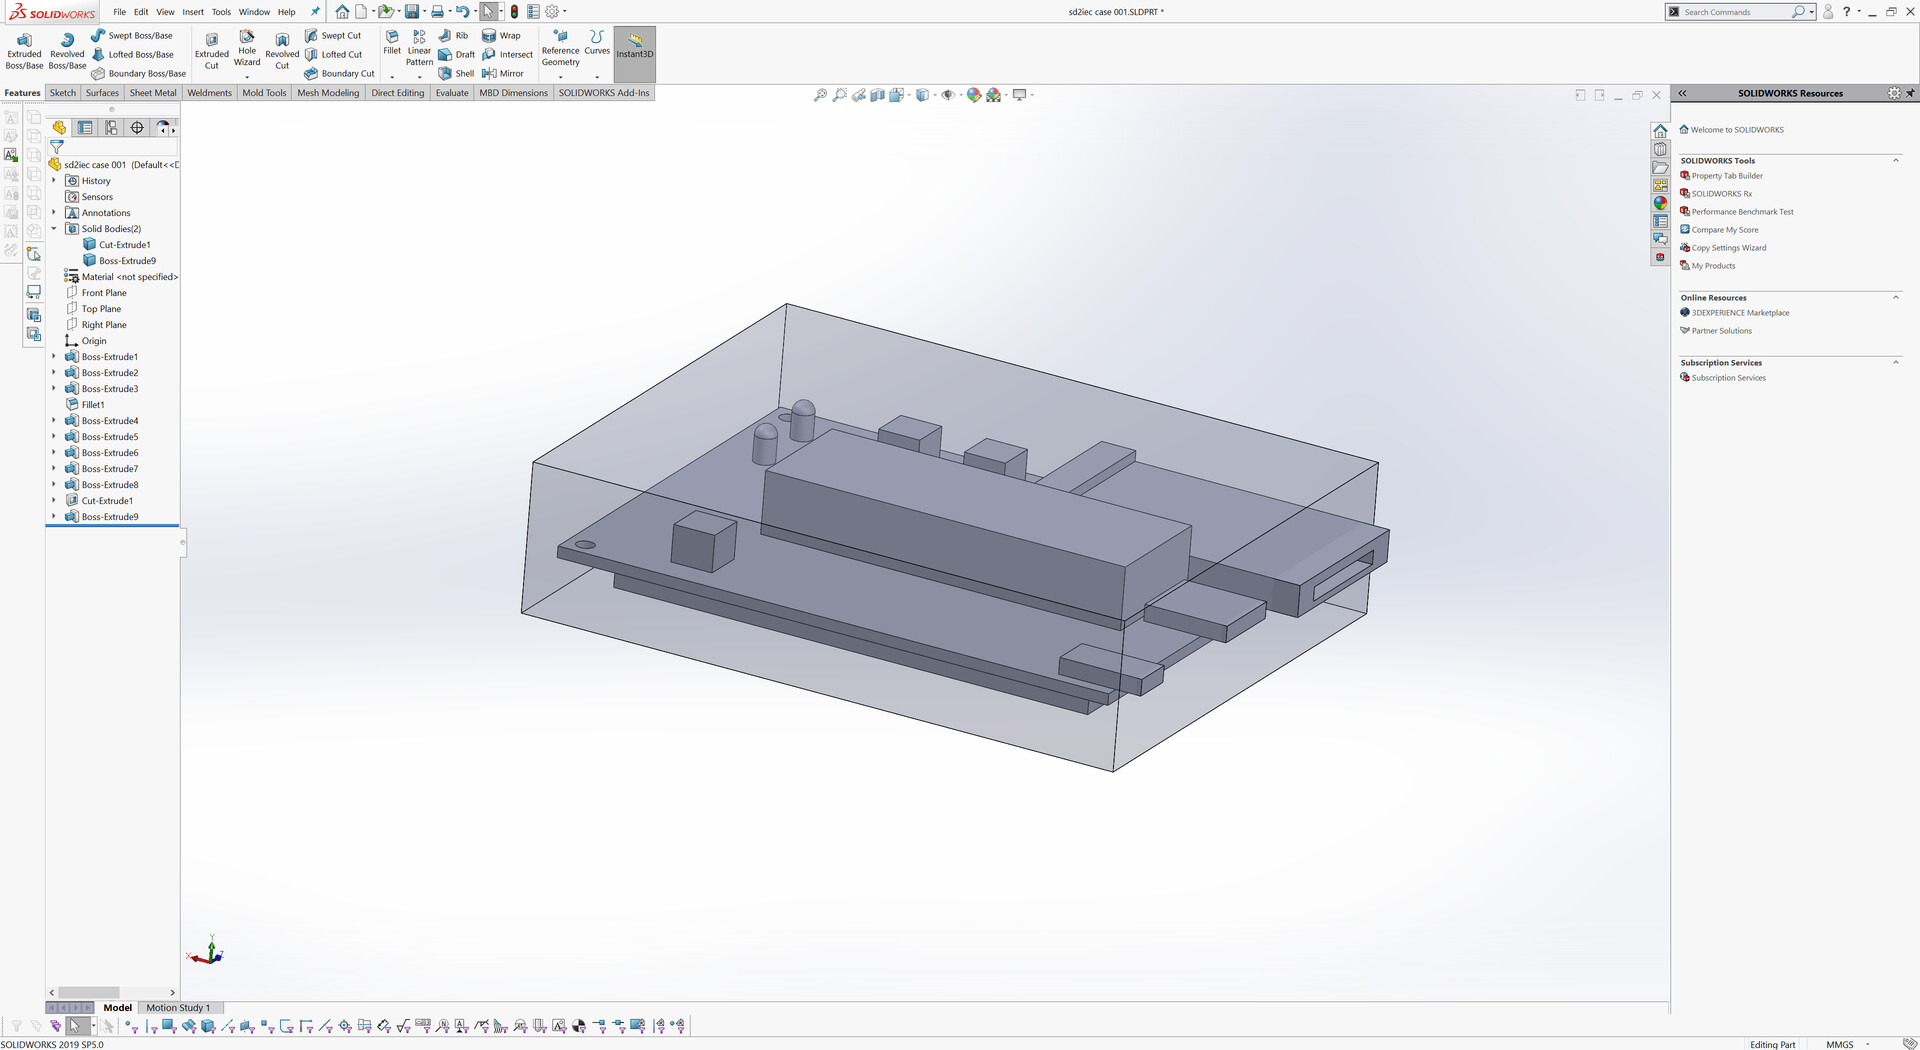
After making the rough object, I completed the case design by making it in 2 parts with a wall thickness.

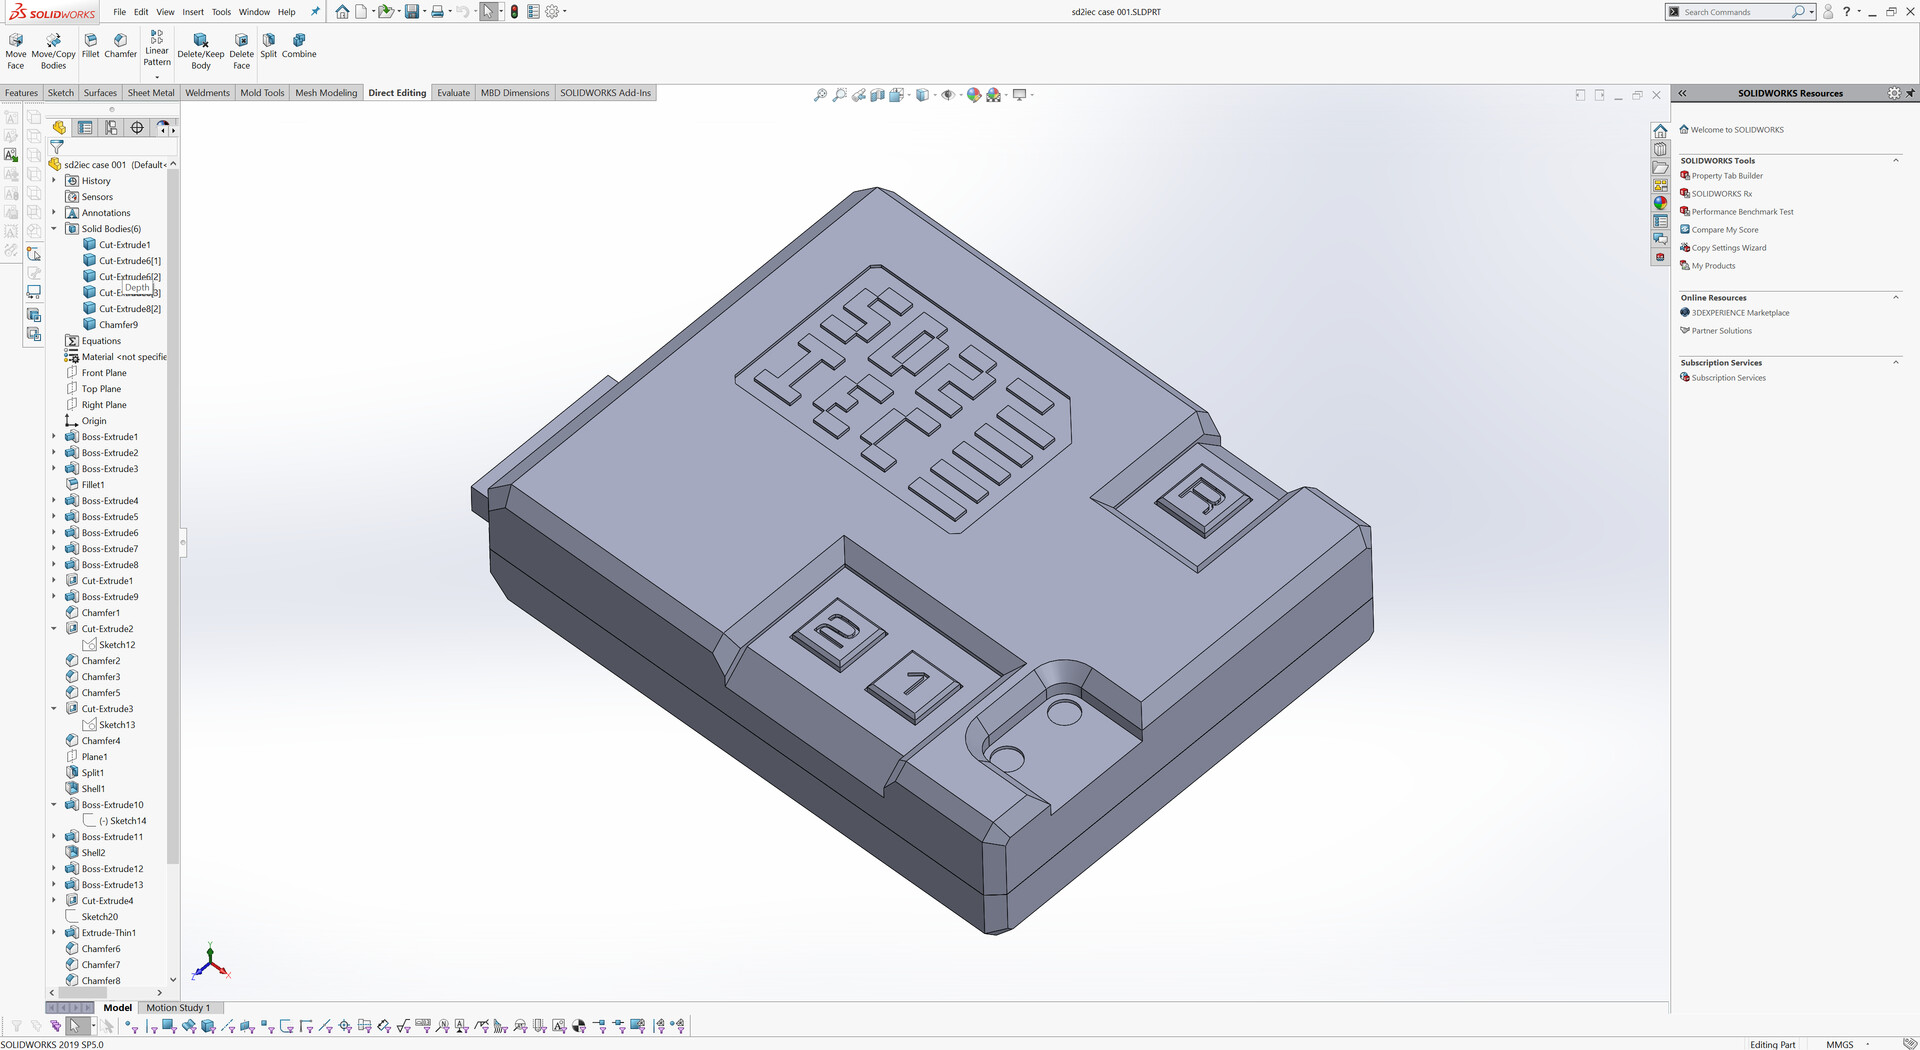
Even I don't like it, but this time I designed the case to be glued to stick the parts. Main reason is getting lazy but other reason is, making a case assembly by shrink-fit or screws needs to expand the outer boundry over the borders of the PCB. It means larger case. Since the electronic part doesn't need any maintenance (SD card is accessible from outside) I made it this way.
This is ithe simple button cap design for to use over the tactile buttons:
And finally I exported the files for 3d printing which took around 3 hours total for the whole set.
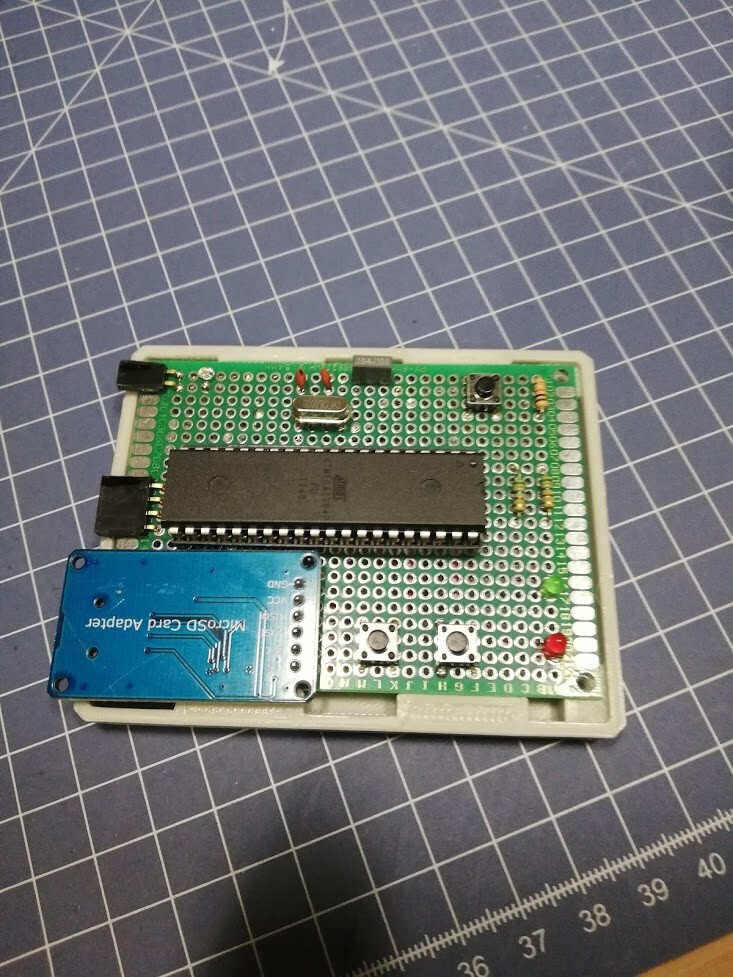
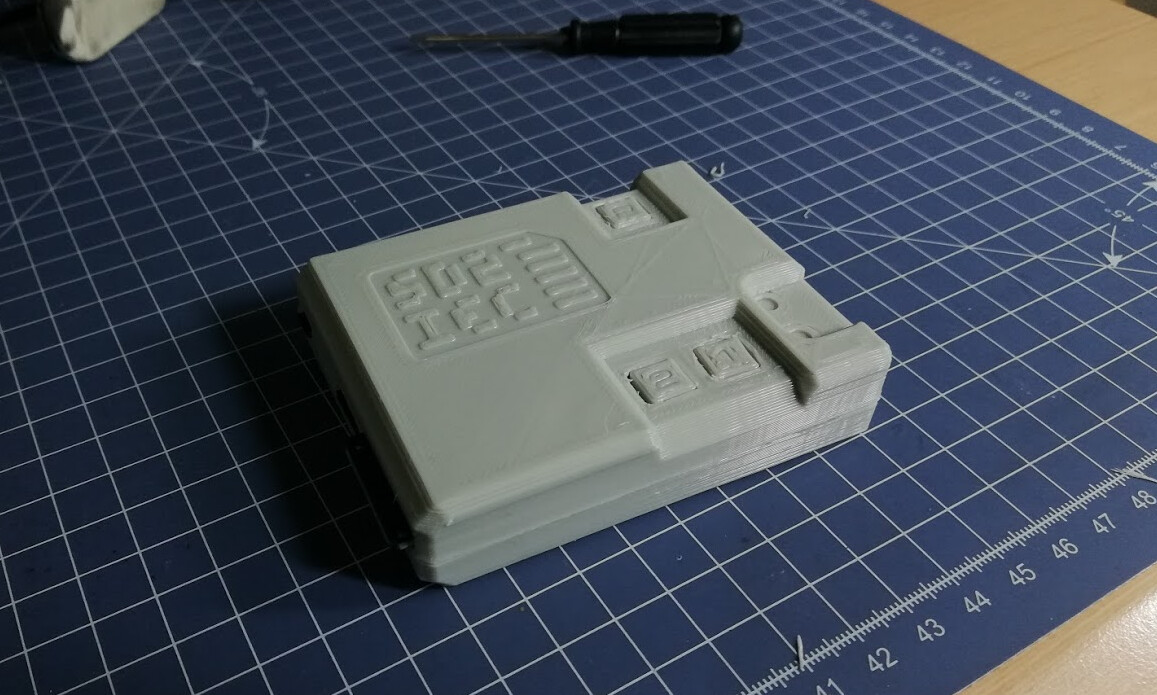
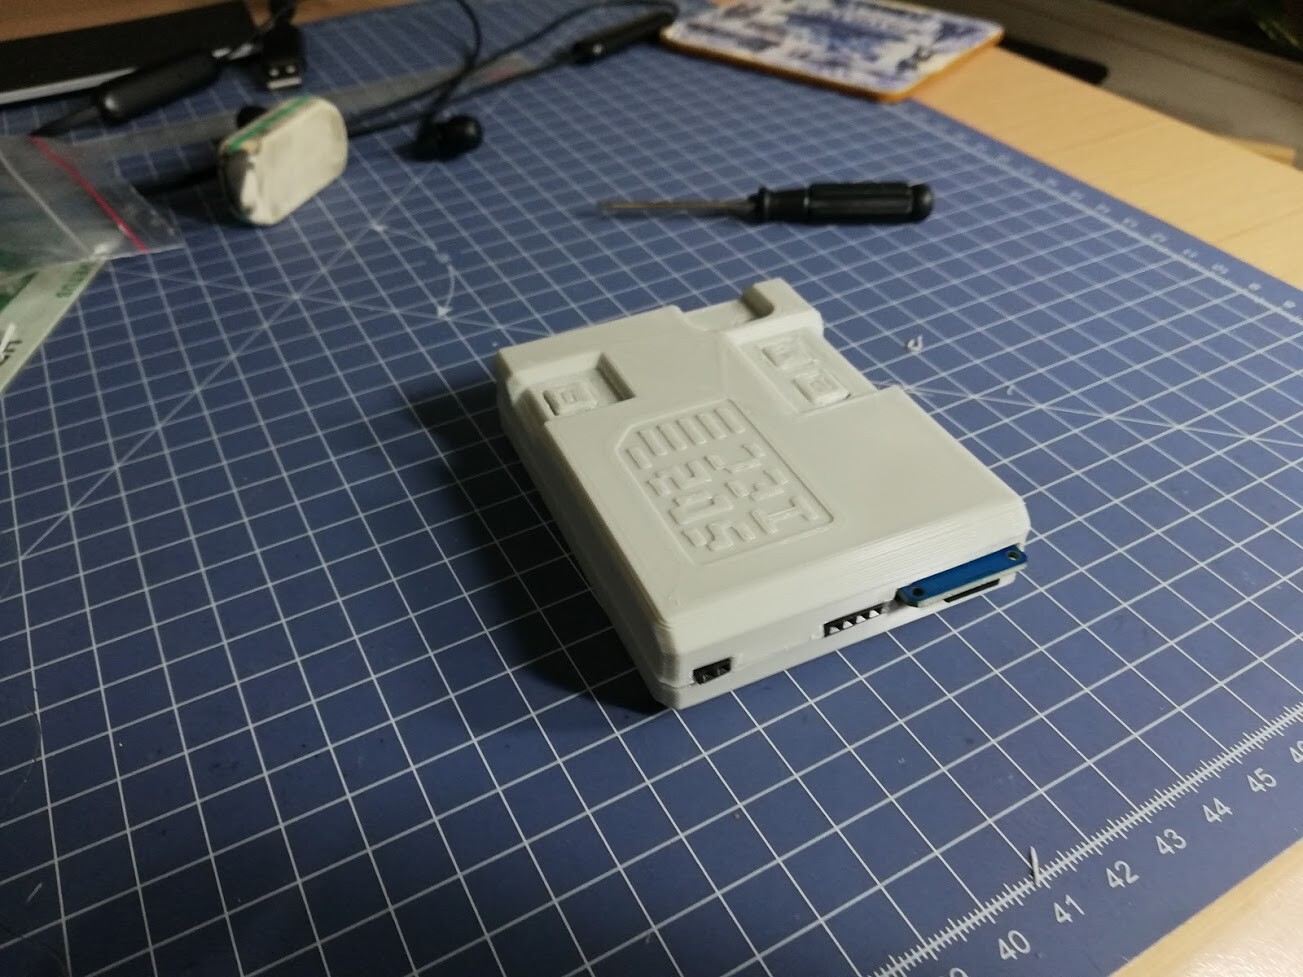
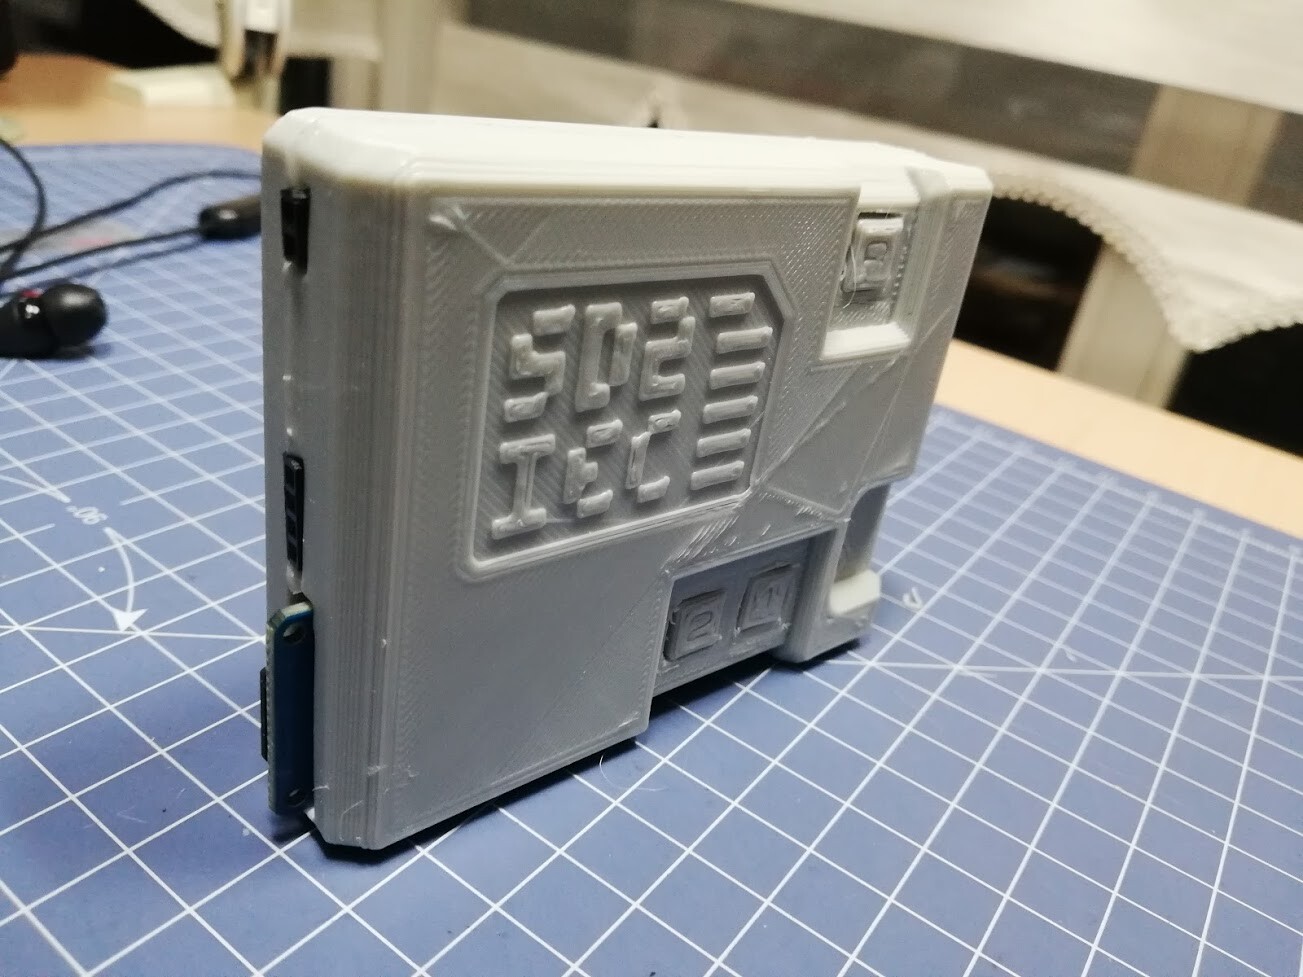
I'm so happy when the designed material is totally comply with the real object after manufacturing it :)
Top part and the button caps.

Gluing the parts (arrgh!)
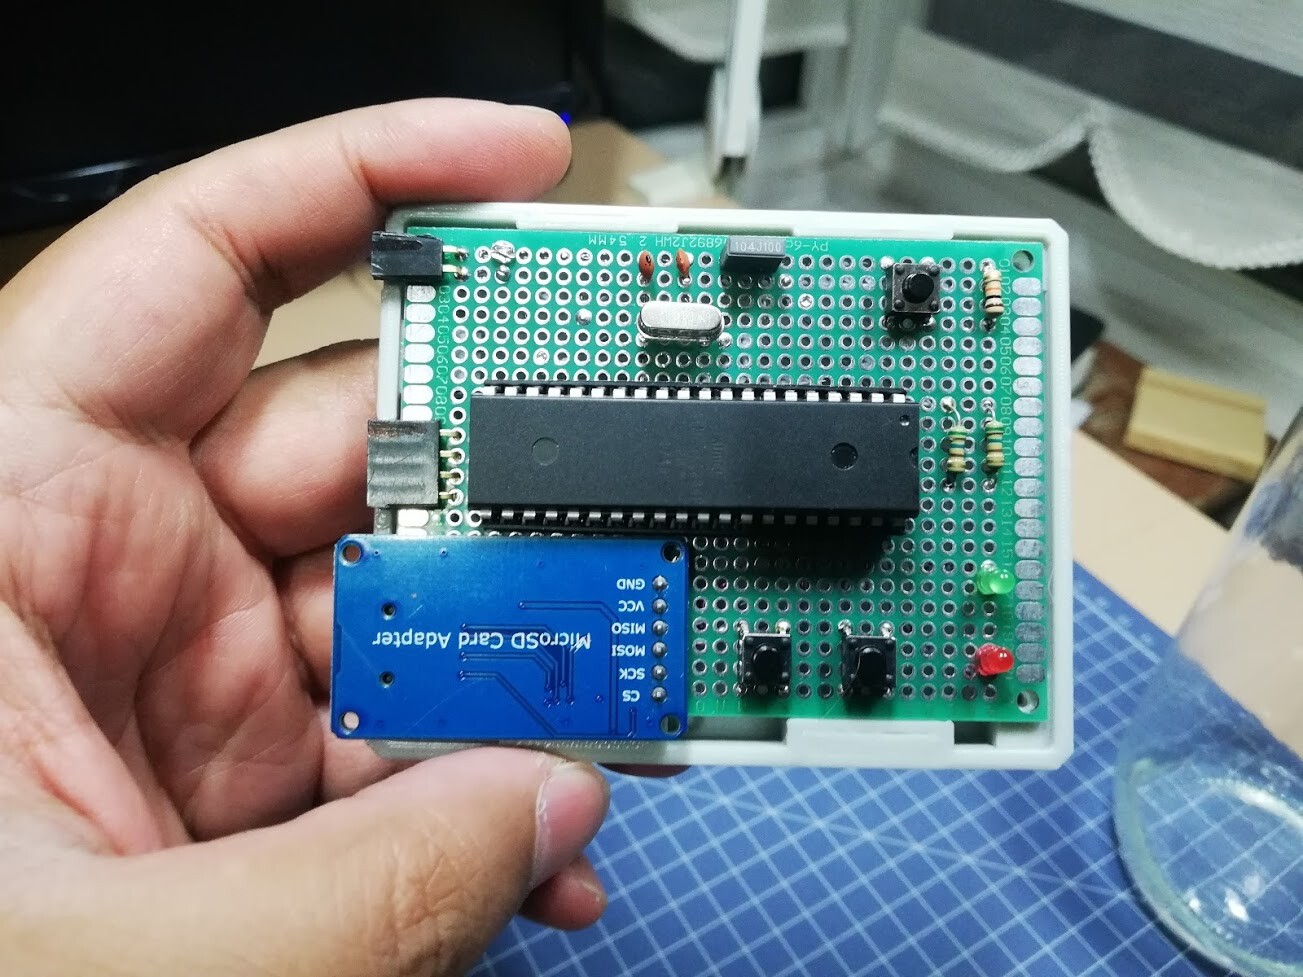
And finally we have the device. I made the 3d printing in a low quaility. But it's better than nothing :)


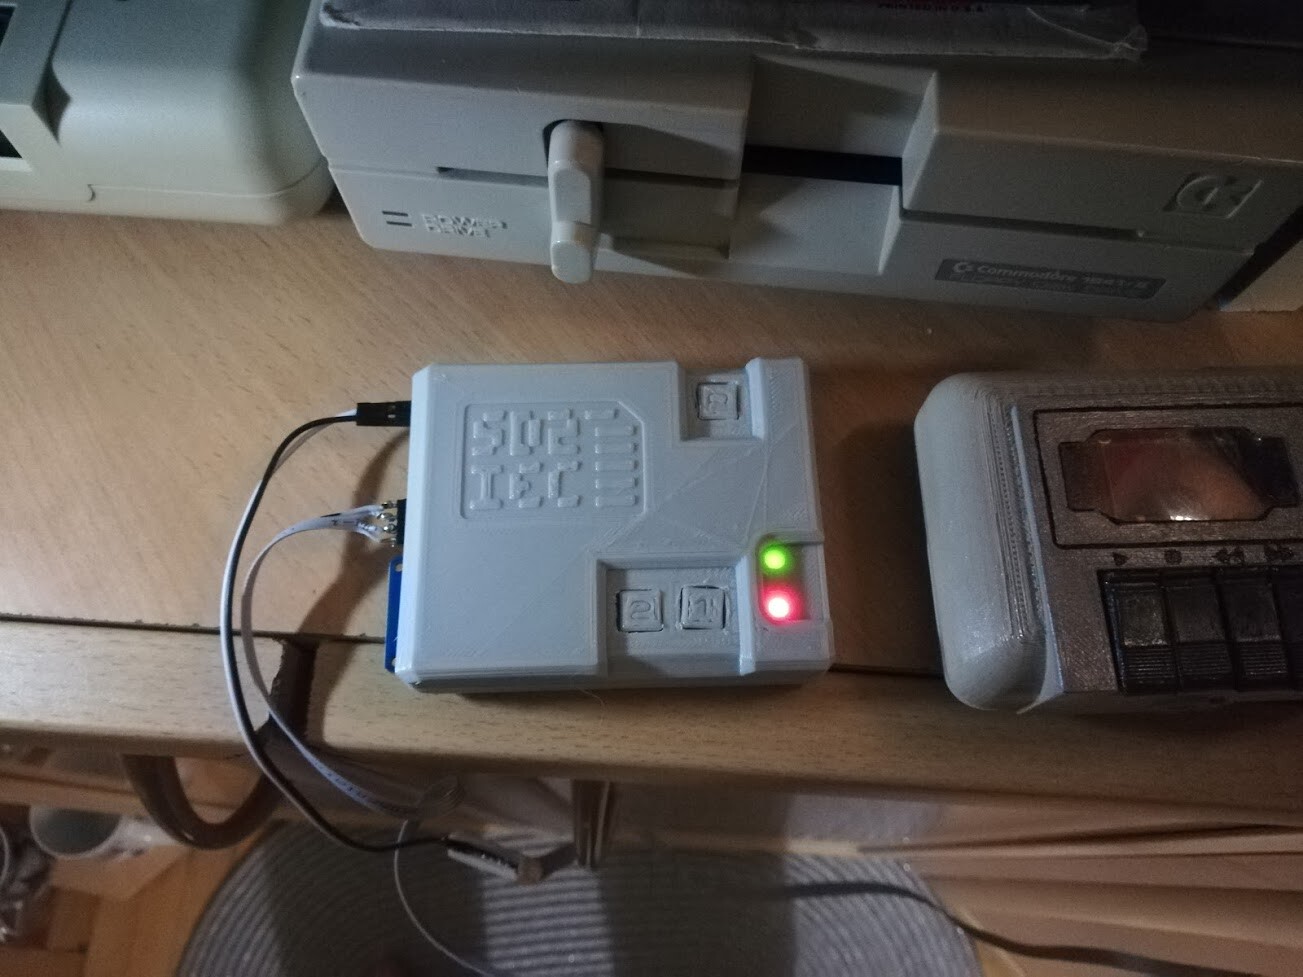
Copying from SD2IEC to real floppy disk.

So this was a quick project but I was in need of that device because of it's extraordinary nature. It has unlimited capacy for a floppy disk, so you can save as much as "freezes". Freeze is a snapshot from a game or program by dumping the bits on the memory to a disk to load it anytime when you need a break. freezes created by freeze cartridges like Action Replay, Final Cartridge etc.
So SD2IEC took its part on my Retro Corner.
Thanks for your time, I hope you like it.
Cem