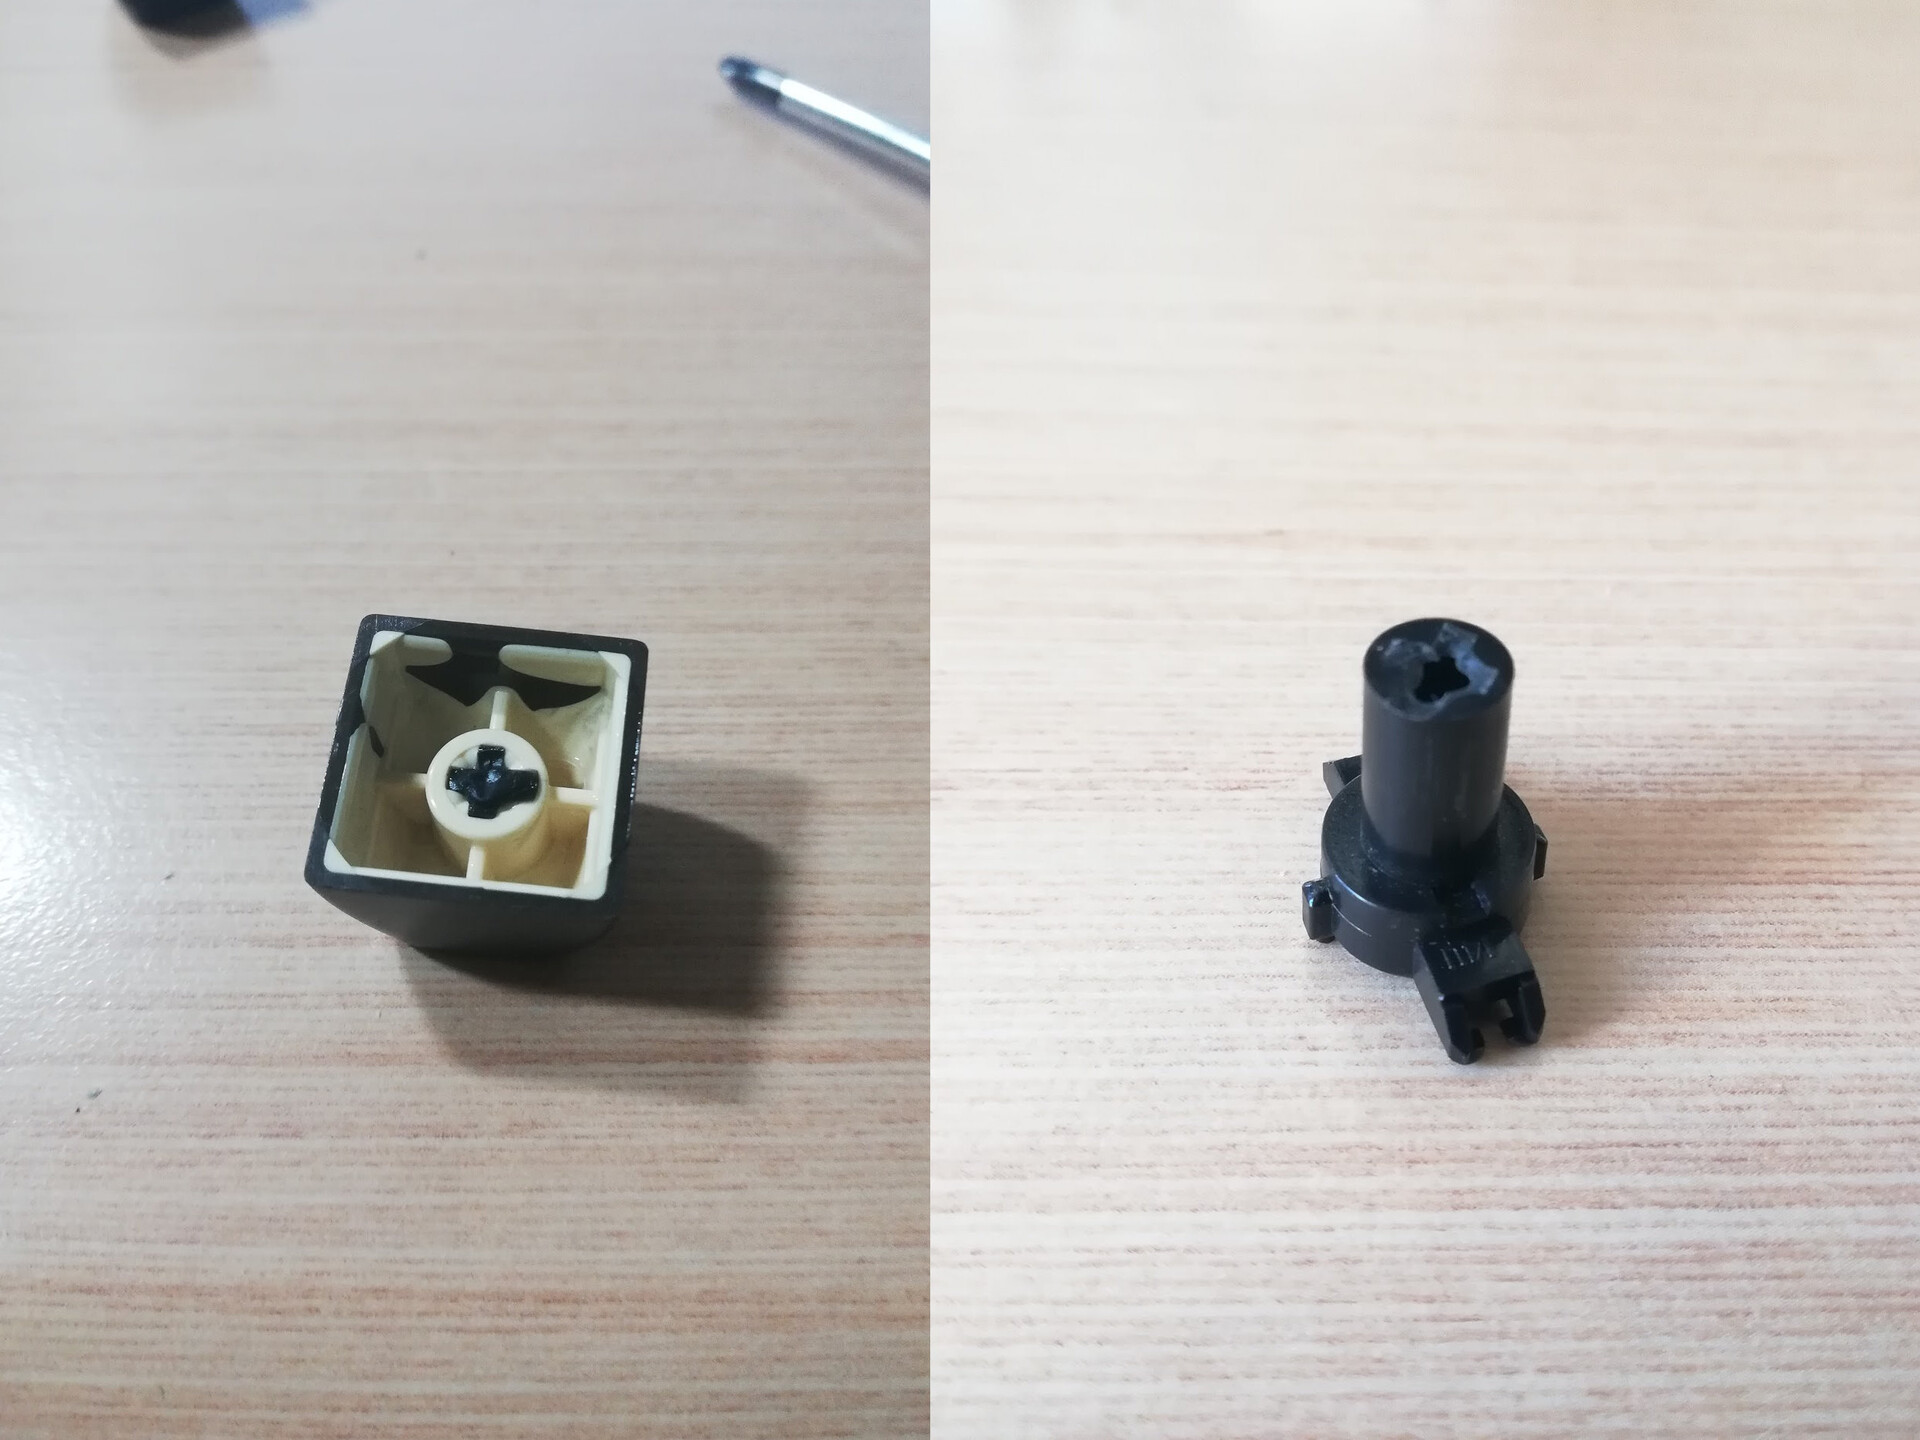
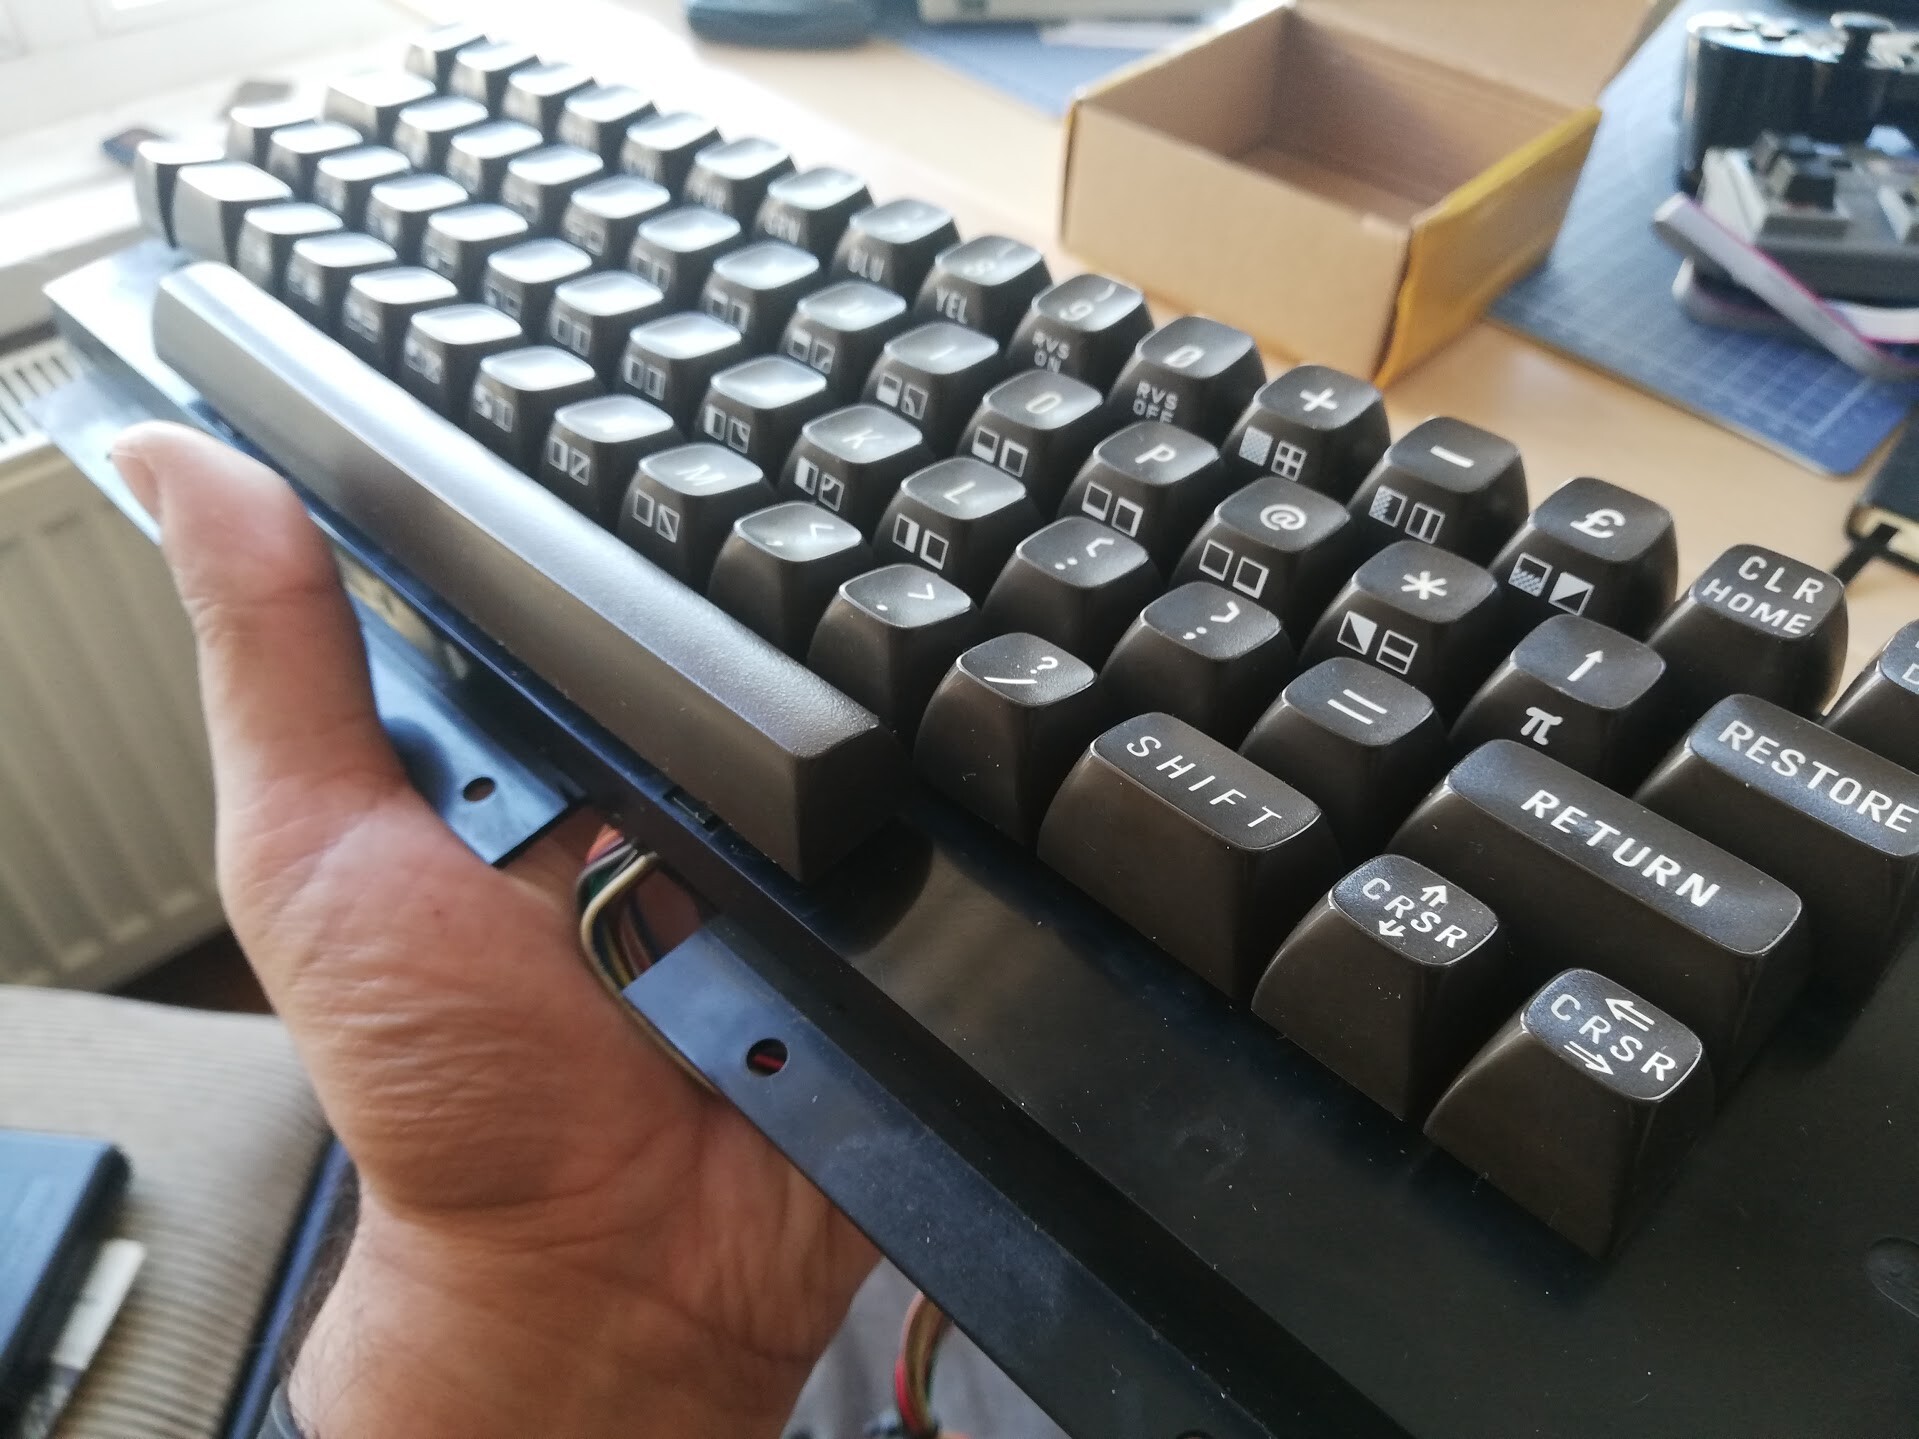
Yesterday I was detaching keycaps of my Commodore 64 to clean the mess under, because some of the keys were not pressing well. But while detaching the keycaps I broke 19 of them. Since the time passed, these key mechanism plastics got crunchy.
Normally this means you need to send your computer to service, and make them replace the key mechanism. Since there is no service of this brand, that mean I need to solve this myself.
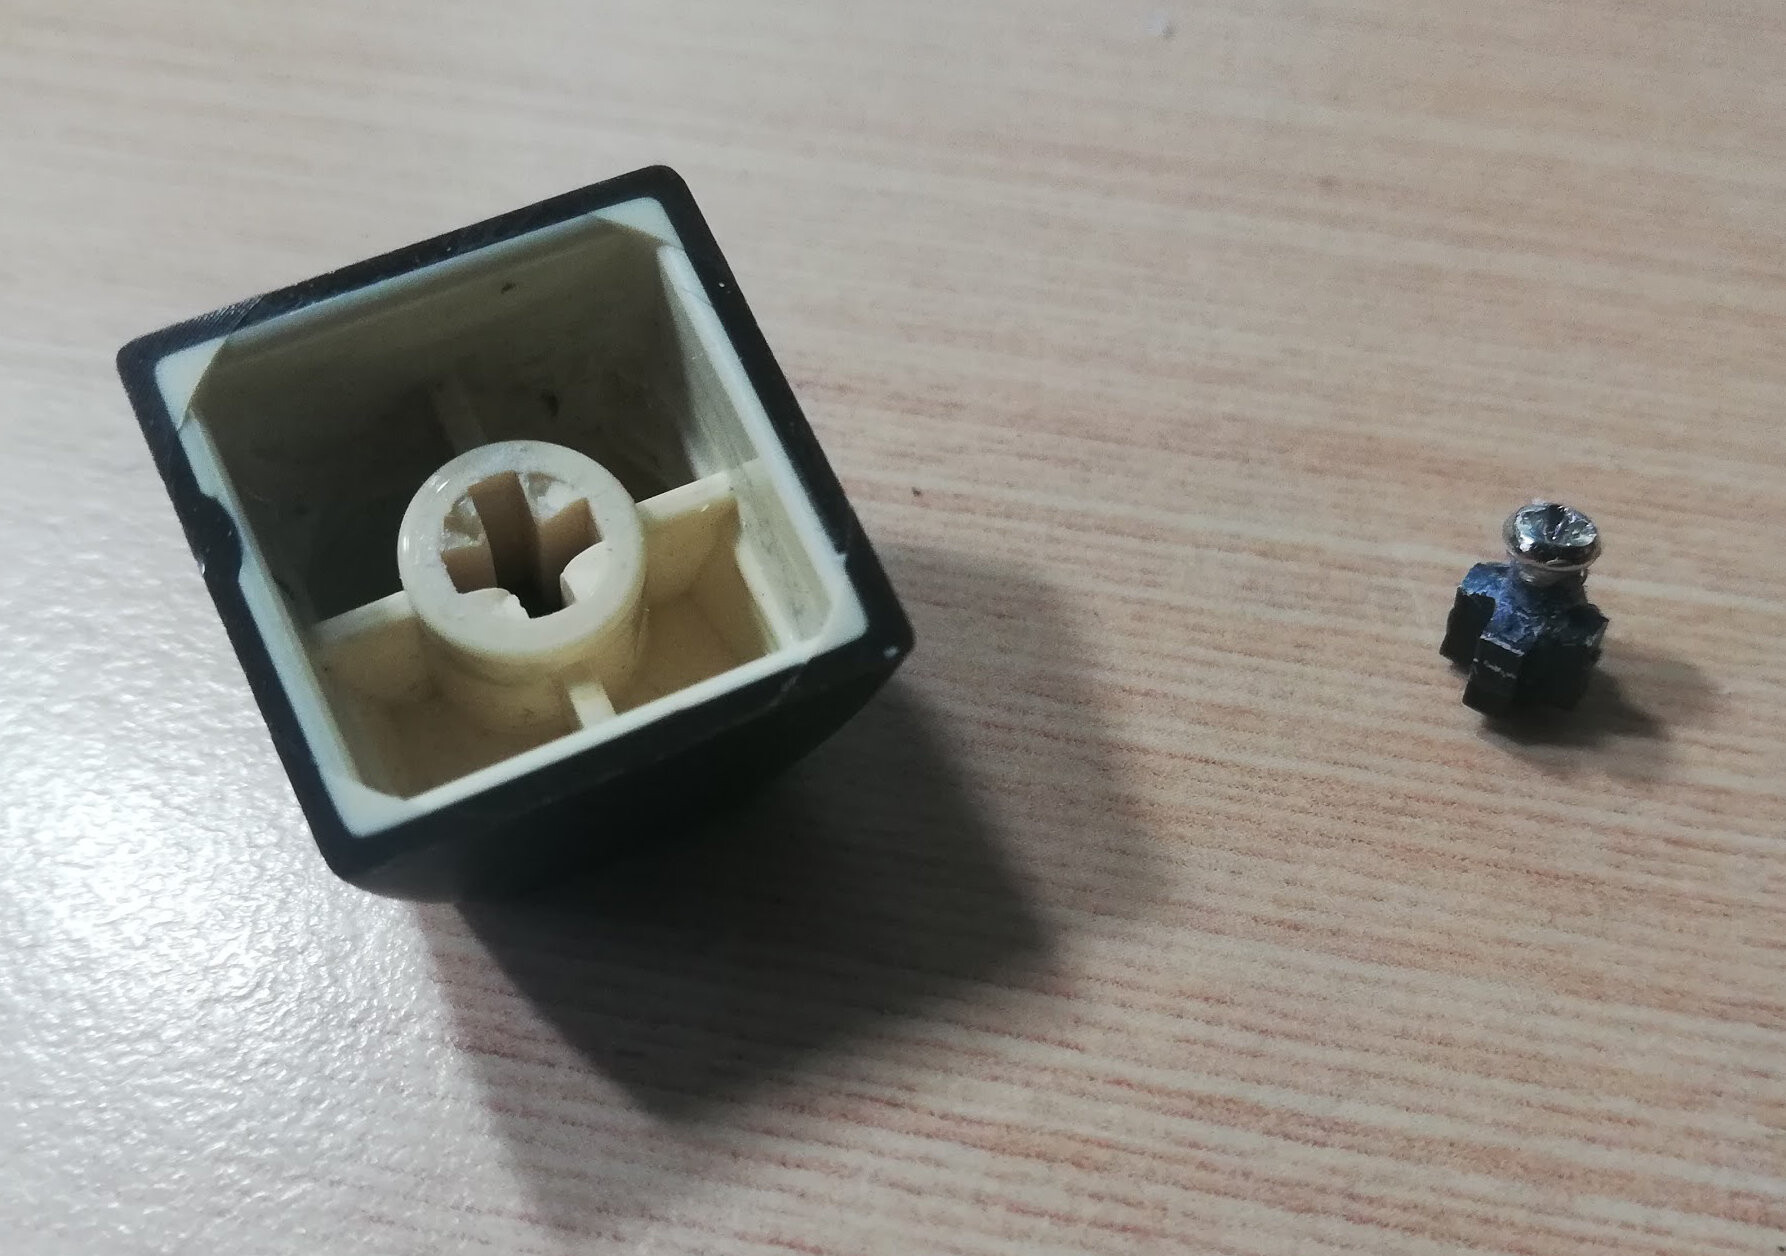
First I tried to super glue the thing but it was not a good idea, since doens't work. After that, I decided to 3d print the parts that I broke down.
But first, I needed to remove the broken part inside the caps. For that, I used "wine cork technique" with a tiny screw! First I screwed it 3-4 steps into the broken part and I pulled it back.
Next, I modeled the existing part with Solidwoks by taking measures with calipers.
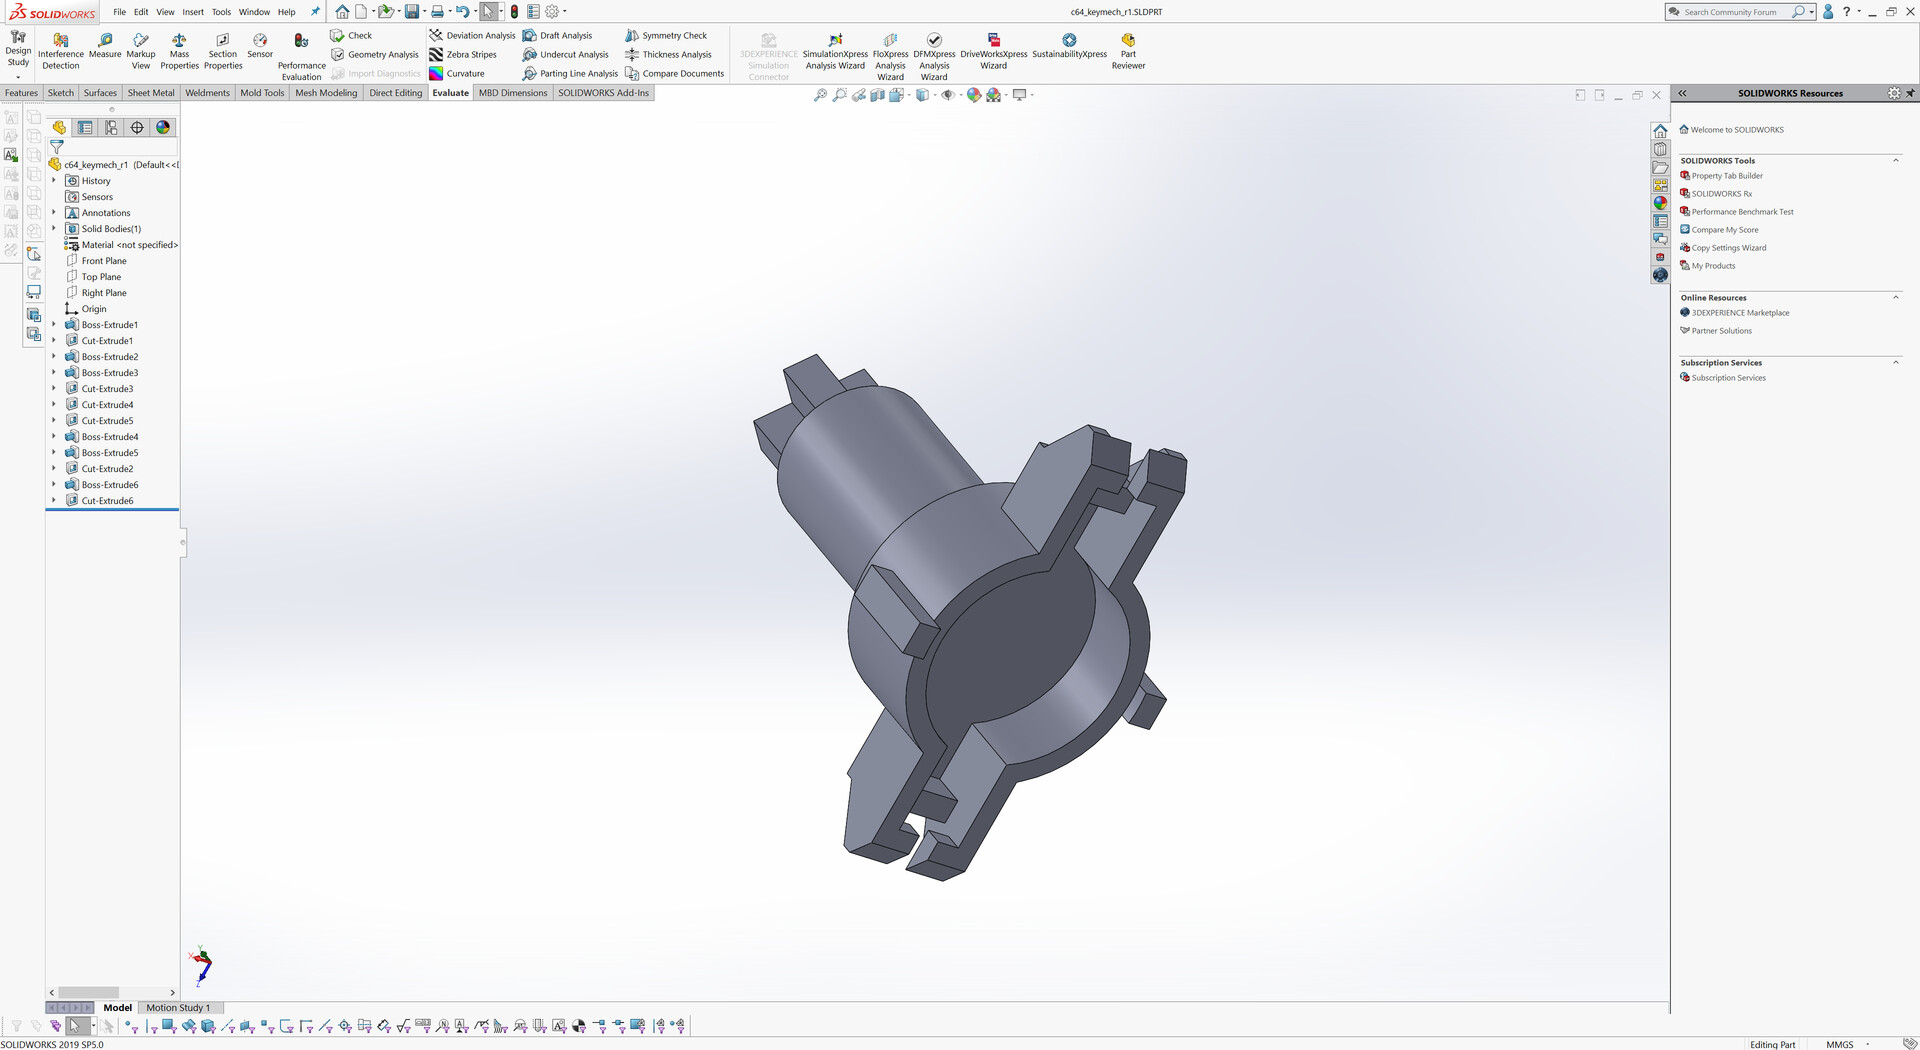
Before printing this kind objects that needs to be used on mechanical purposes, I make the slicing angular (about 30°). This way printing layers will be angular, so part will be more durable for the forces on the arms.

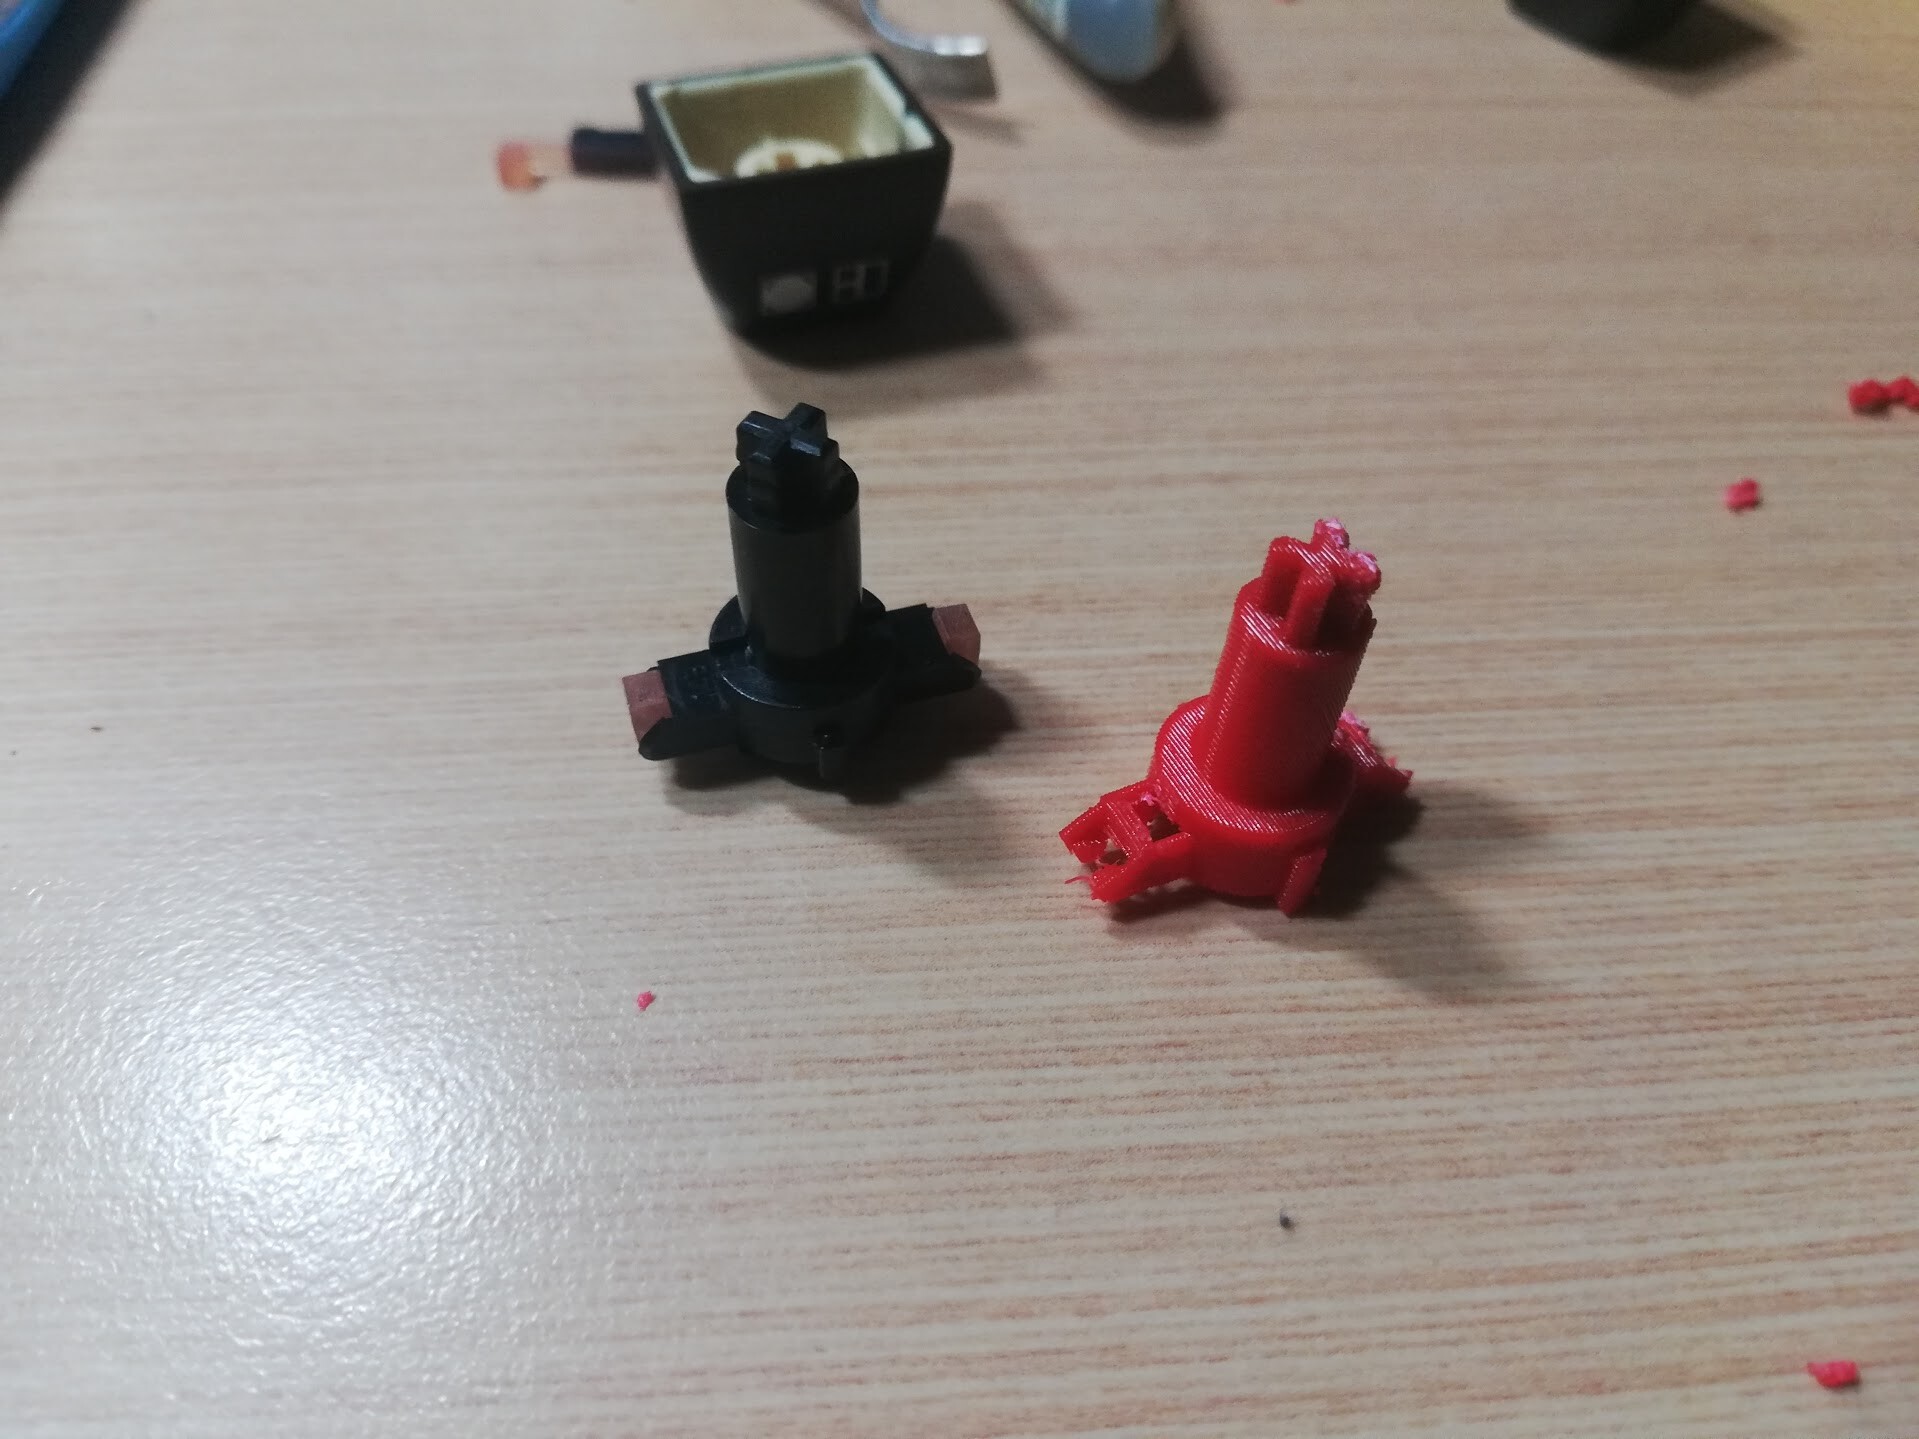
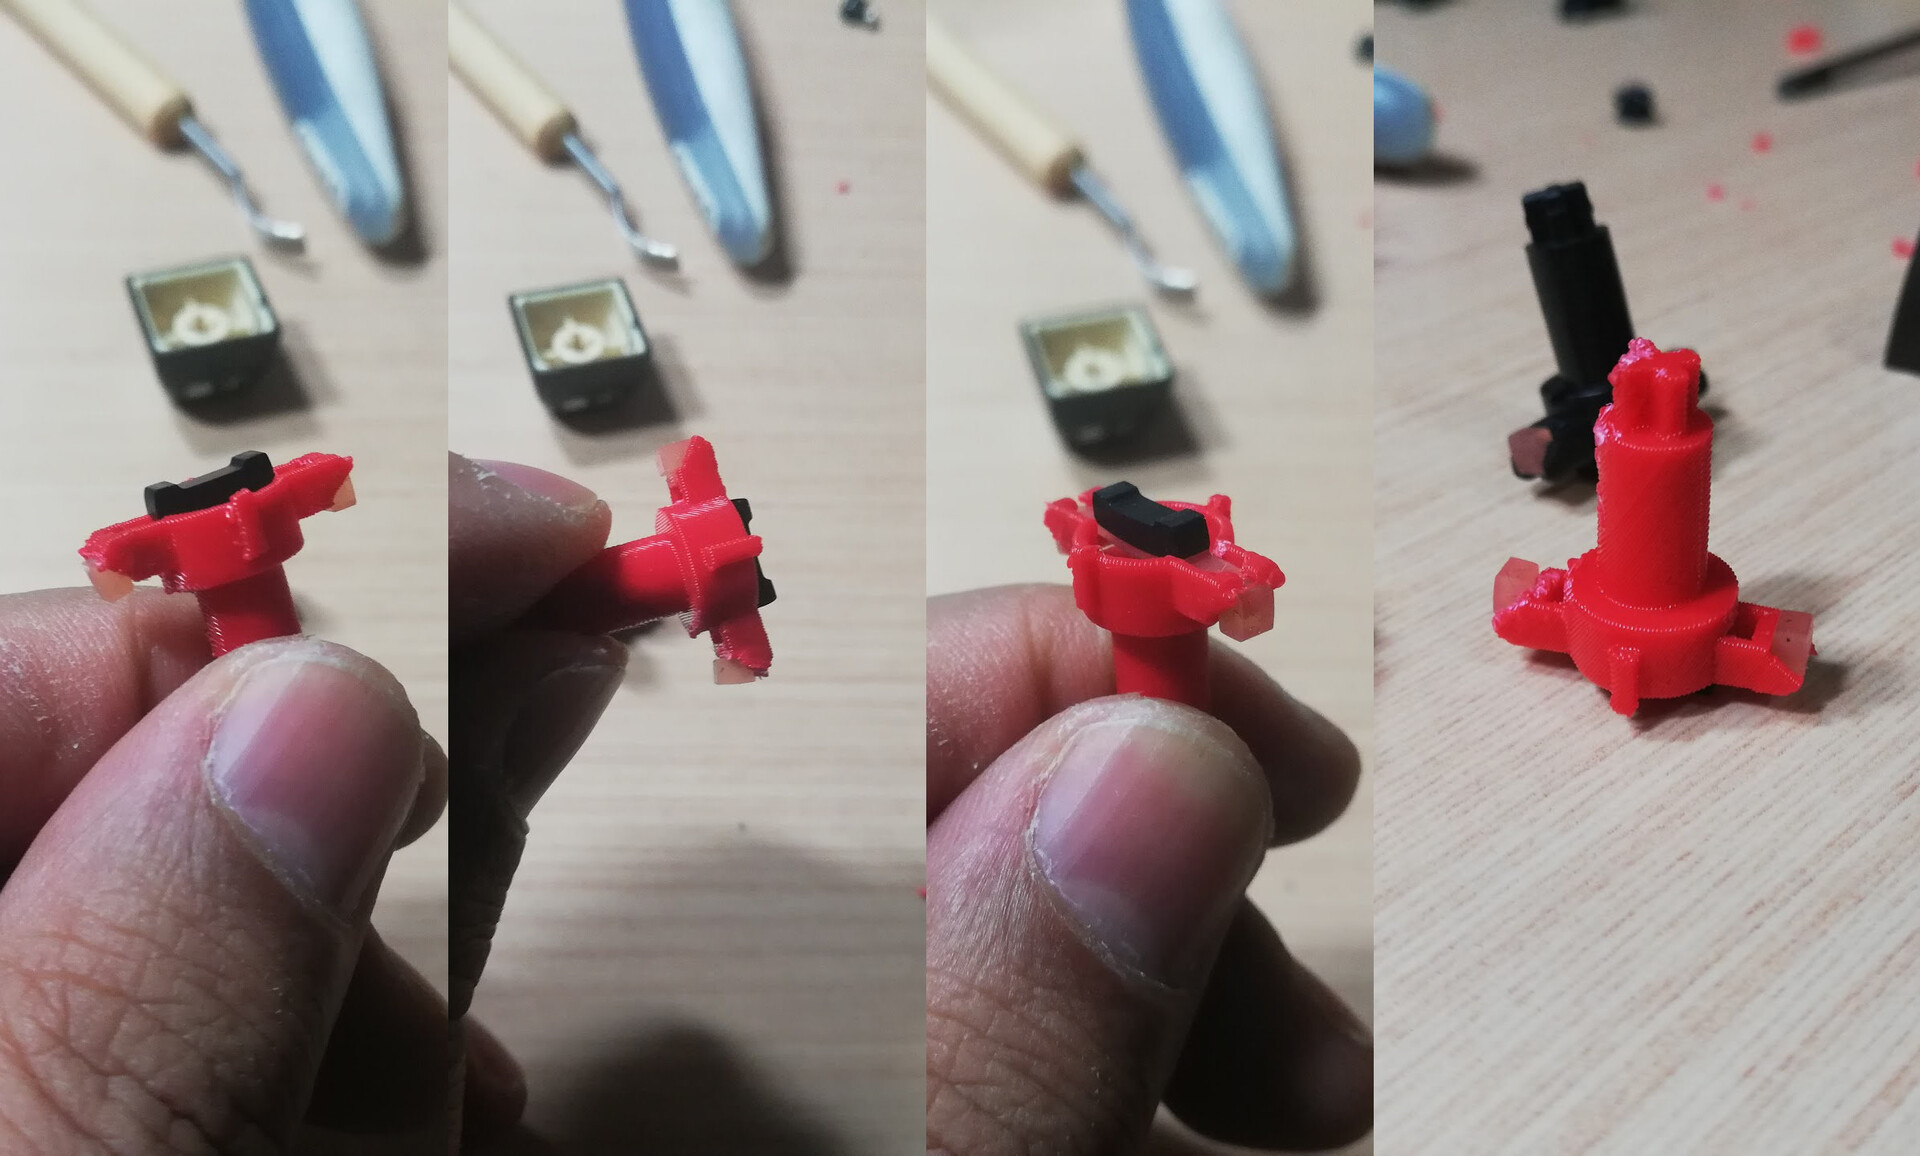
Since it is roughly 10mm to 18mm part, I wasn't sure that it will come out correctly. Because there is a rubber conductor part that needs to be attached to that part to make it work.

I'm very happy with the result.
Time to attach the rubber conductor.
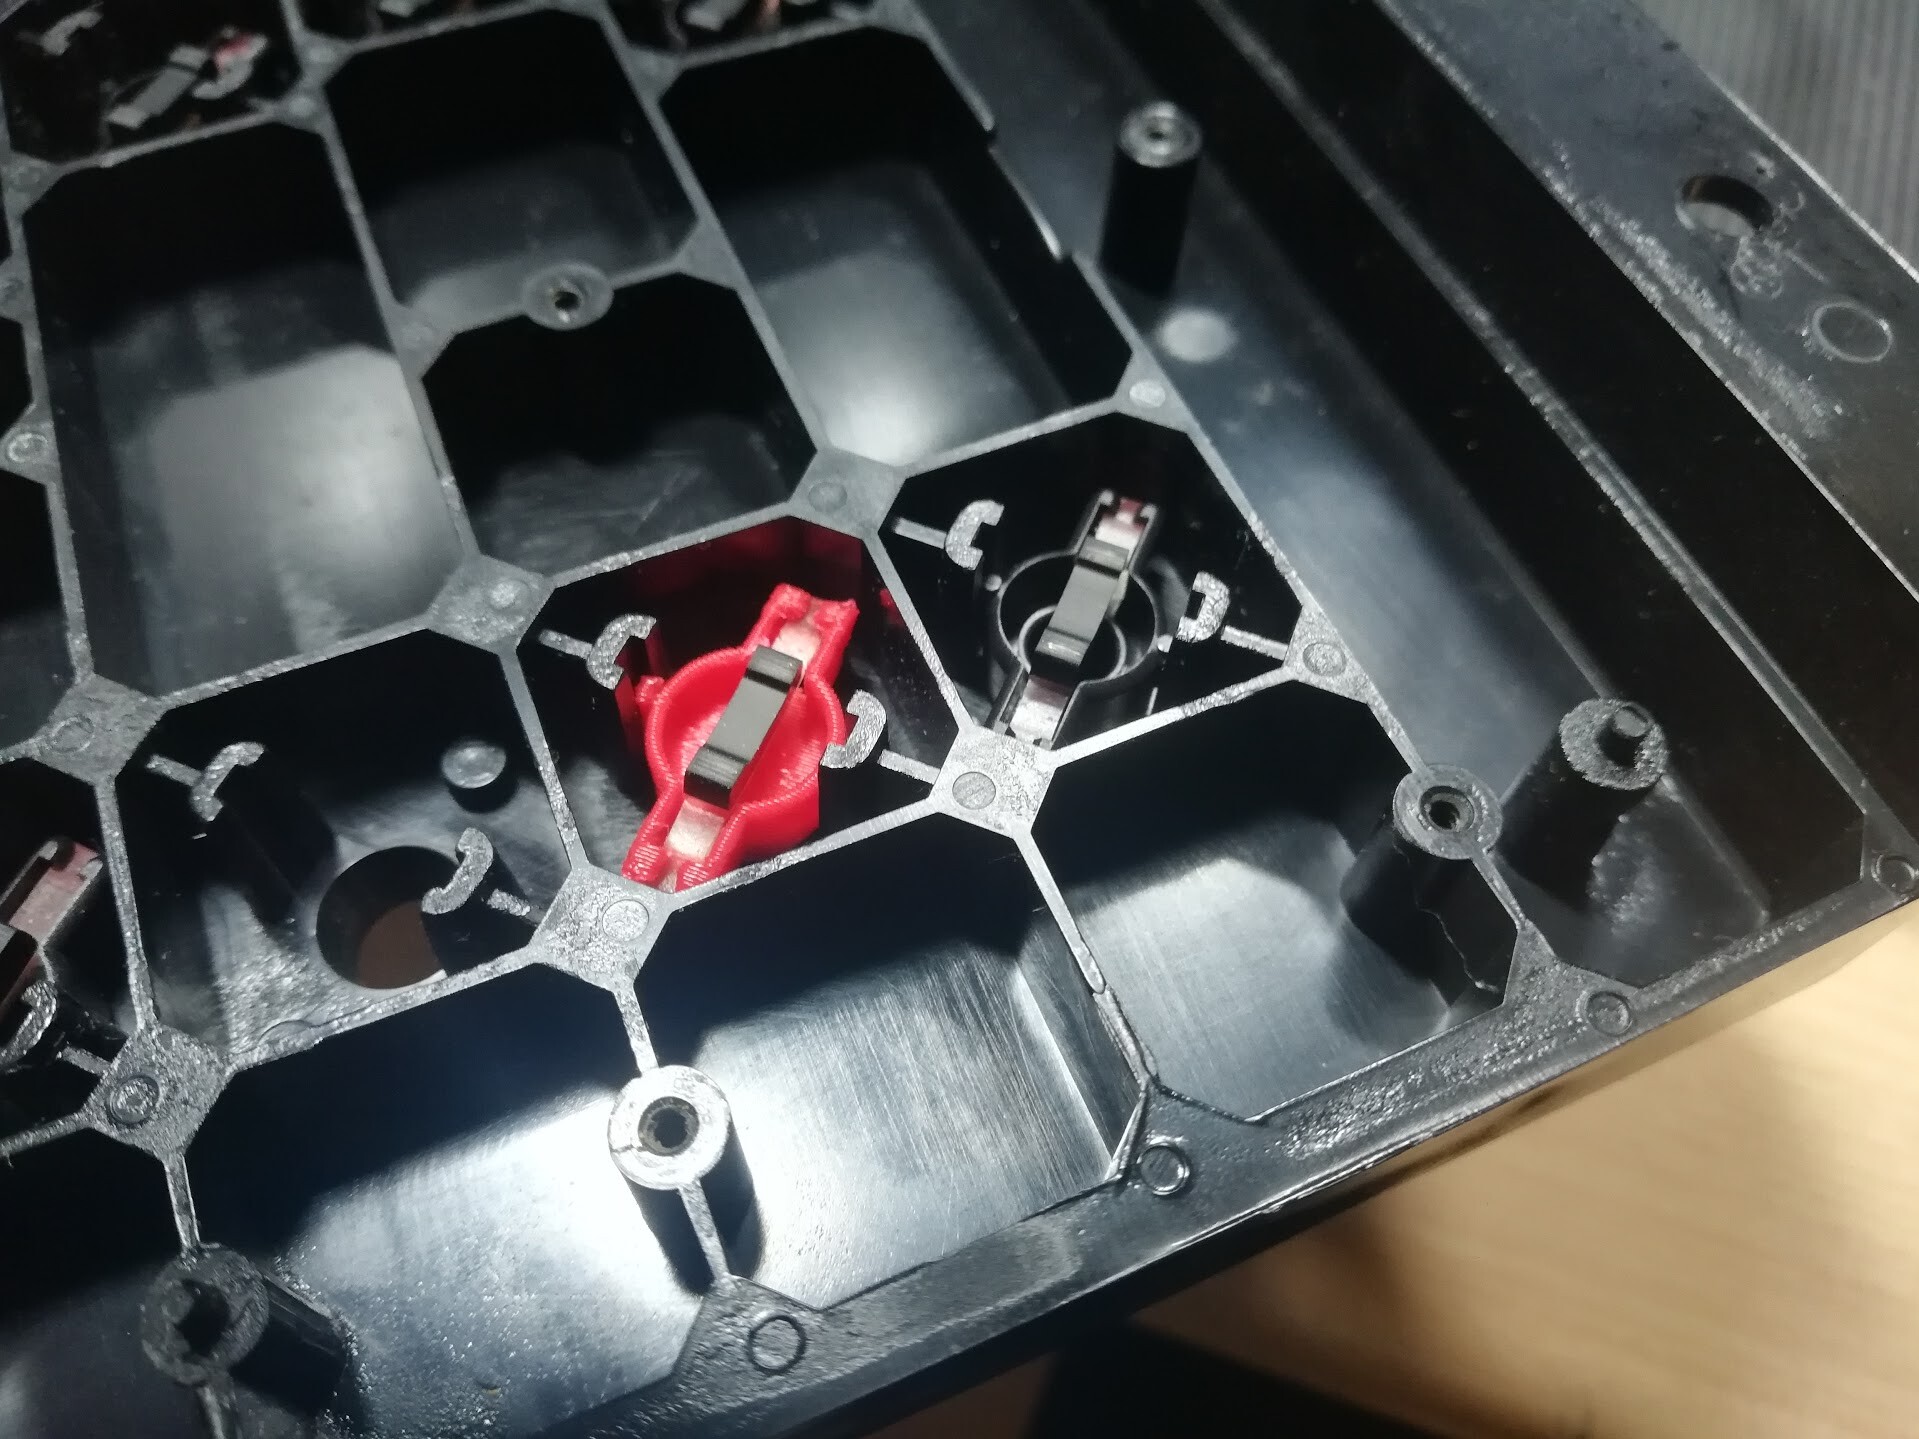
Let's apply the replacements!
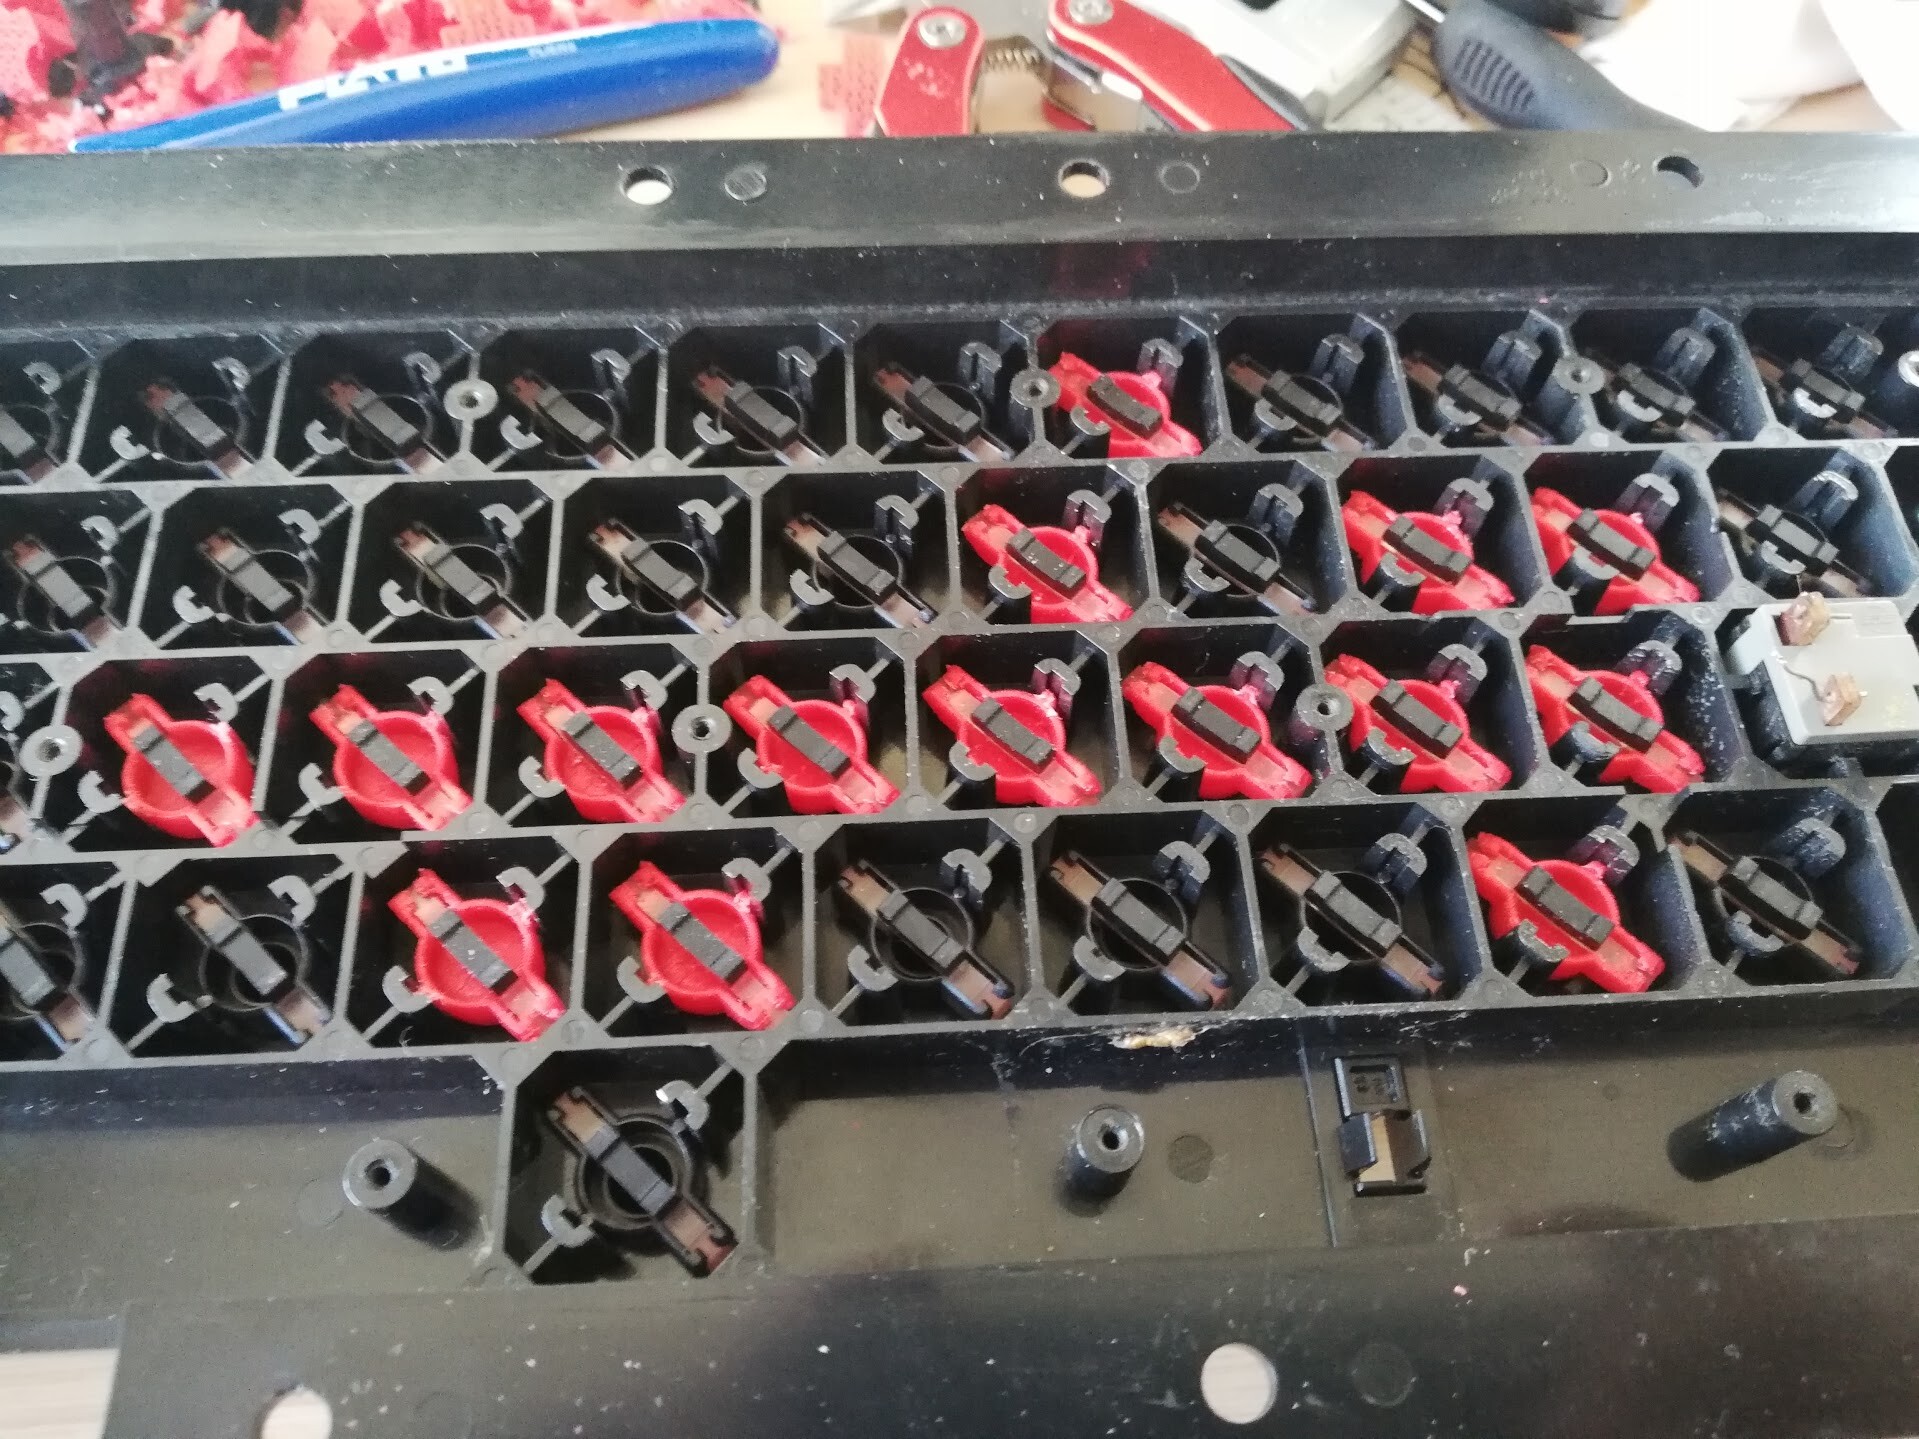
Alignment is perfect as well!

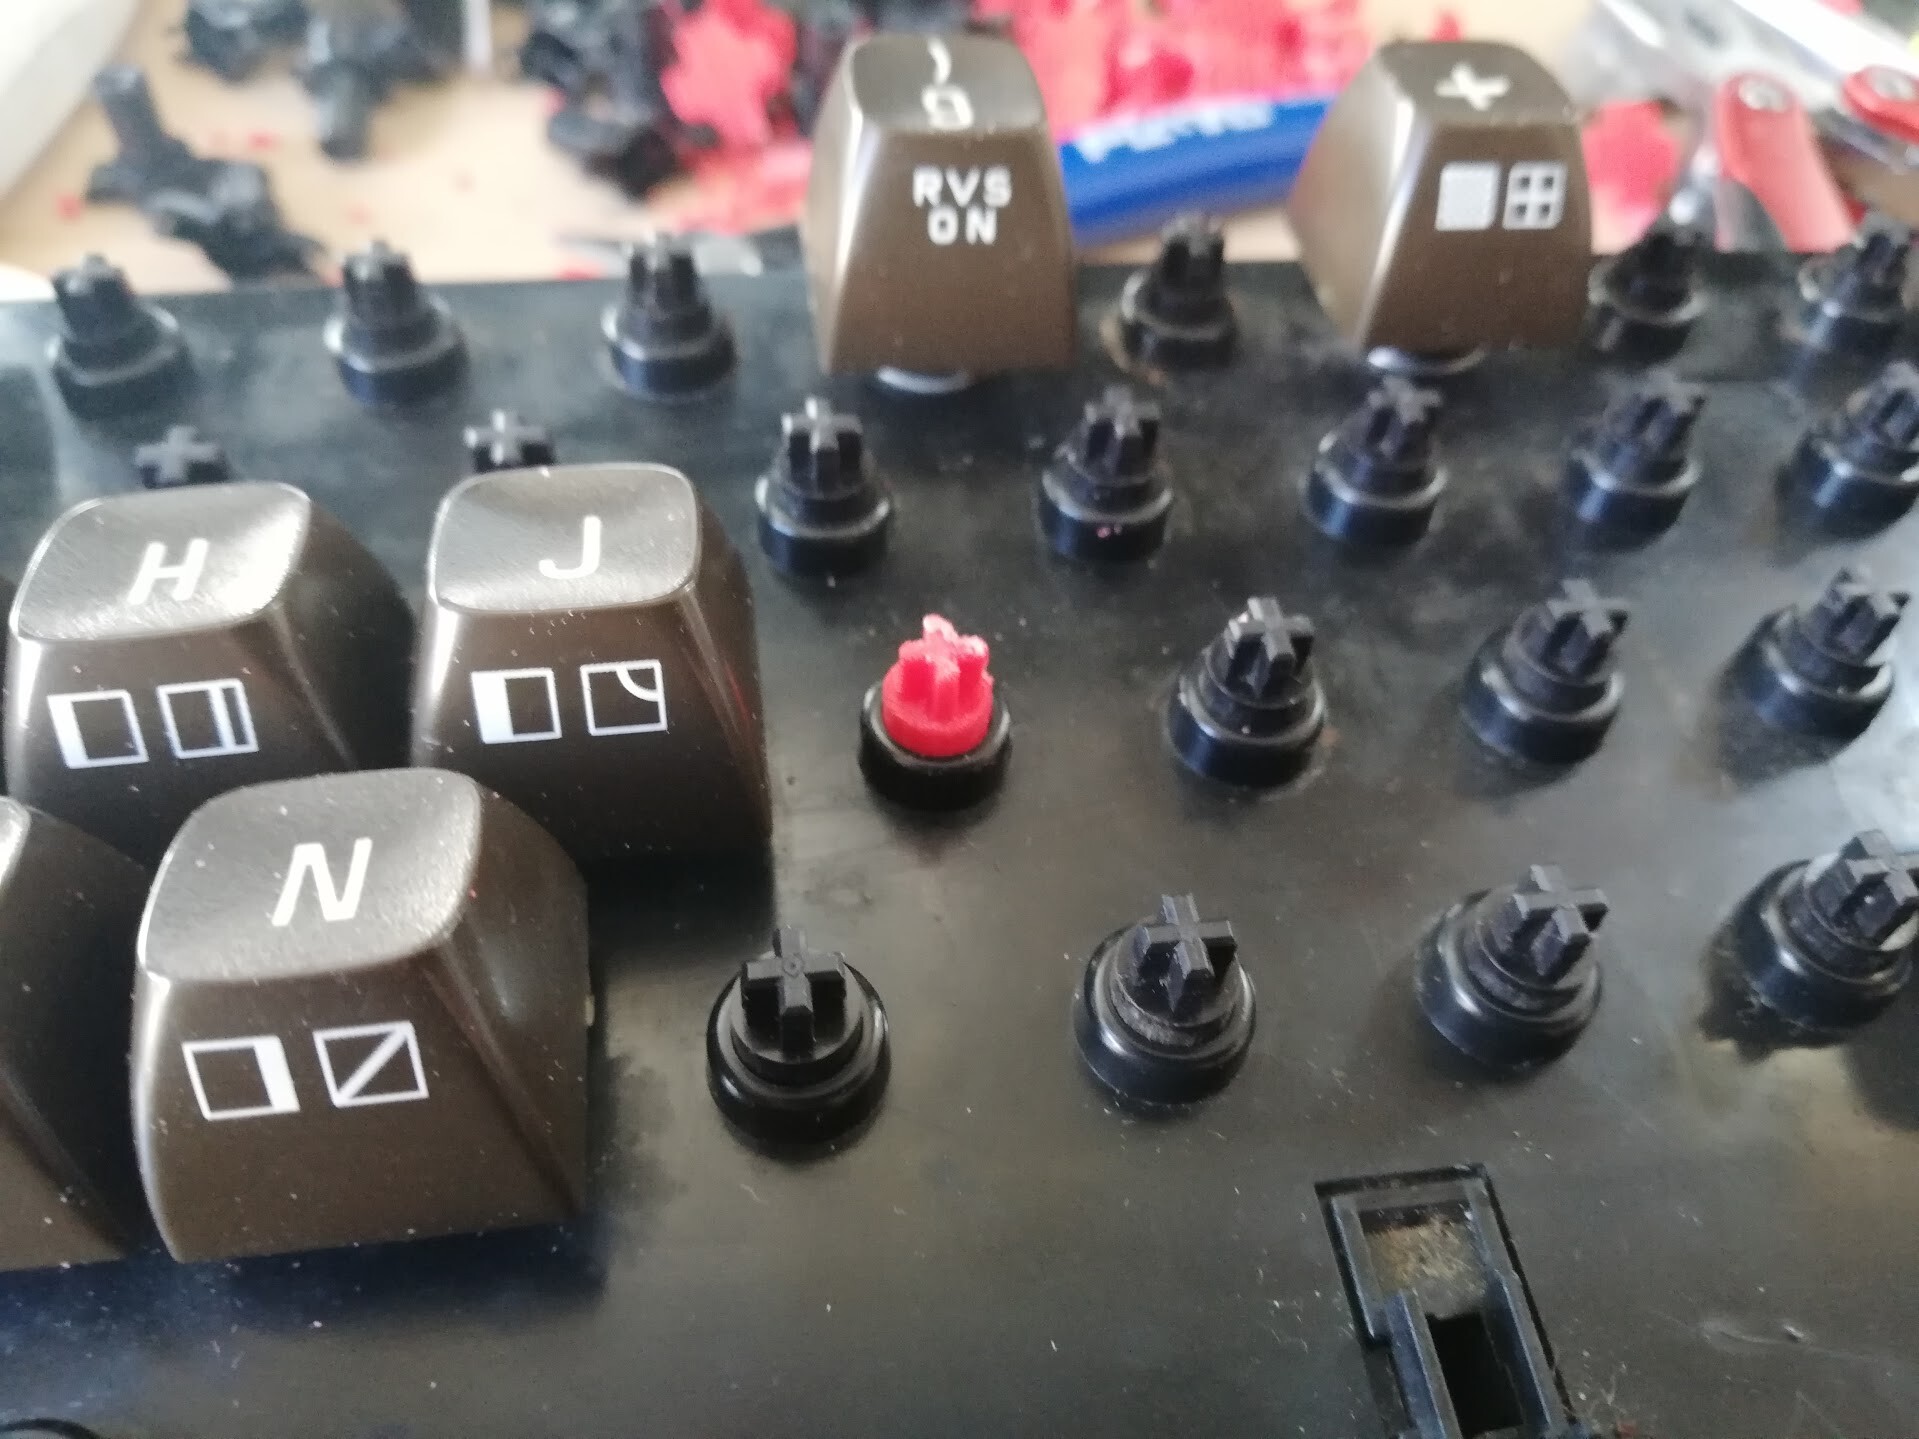
Works great! Thanks for reading.
Also this part can be downloaded by this link: https://www.thingiverse.com/thing:4691398